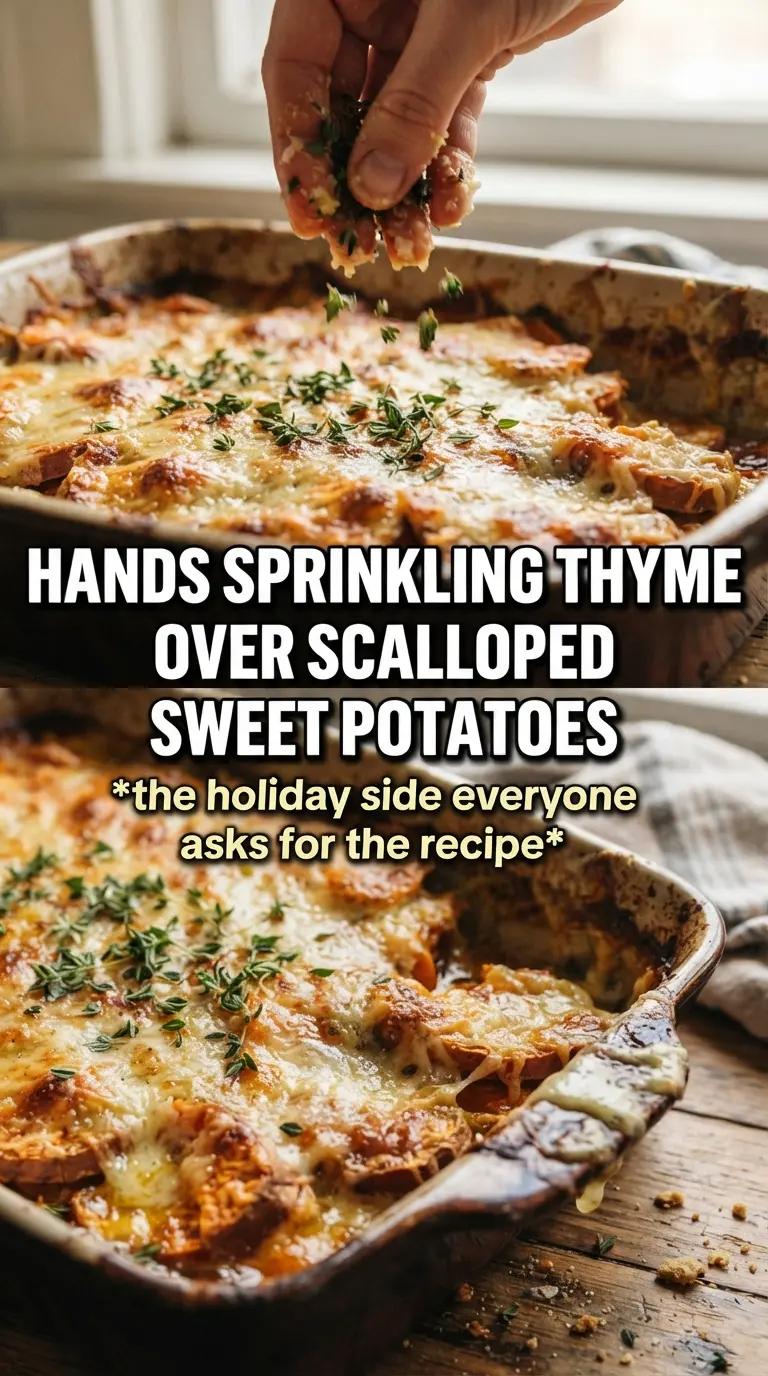
Thin layers of sweet potatoes, baked until tender in a garlicky cream and finished with a crackly blanket of Gruyere and parmesan, turn into the kind of side dish that gets scraped clean before the main course is halfway gone. The maple syrup and warm spices don’t make it sugary; they round out the sweetness of the potatoes and give the whole pan a deeper, more savory finish.
What makes this version work is the balance. The cream mixture is seasoned before it hits the dish, so every layer gets flavor instead of relying on the cheese alone. The foil-covered bake softens the potatoes without drying them out, then the uncovered finish melts the cheese into a browned top while the edges caramelize just enough to taste rich, not candy-sweet.
Below, I’ll walk through the part that matters most: slicing the potatoes evenly so they cook at the same pace, plus the rest time that keeps the sauce from running all over the plate when you serve it.
The potatoes cooked through perfectly and the sauce stayed creamy instead of watery. I loved the little hit of maple with the Gruyere on top — my family kept going back for seconds.
Love the look of these scalloped sweet potatoes? Save them to Pinterest for the golden Gruyere crust and caramelized maple edges.
The Slice Thickness That Decides Whether the Potatoes Turn Silky or Stay Firm
Scalloped sweet potatoes live or die by how evenly they’re sliced. Too thick, and the center stays stubborn while the top overbrowns. Too thin, and the layers collapse into softness before they ever build that distinct stacked texture. A mandoline gives you the cleanest result here, but a sharp knife and a steady hand work if you keep the slices close to 1/8 inch.
The other common problem is a watery dish. Sweet potatoes give off moisture as they bake, and the cream mixture should help that liquid feel rich, not soupy. That’s why the dish is covered for the first part of baking: it traps steam so the potatoes soften evenly before the cheese goes on top.
- Even slices — they cook at the same pace, which keeps some layers from turning mushy while others stay firm.
- Covered bake first — this softens the potatoes without losing moisture to the oven.
- Final uncovered bake — that’s when the top browns and the sauce thickens around the edges.
What Each Ingredient Is Actually Doing in This Dish
- Sweet potatoes — choose firm potatoes with smooth skin. Their natural sweetness is the backbone of the dish, and they need to be thinly sliced so the cream can work between the layers.
- Heavy cream and whole milk — the cream gives body, while the milk keeps the sauce from feeling overly dense. You can swap the milk for half-and-half if that’s what you have, but don’t use all milk unless you’re okay with a thinner result.
- Gruyere — this is the cheese that brings the dish into savory territory. It melts smoothly and browns beautifully. Swiss cheese can stand in, but it won’t taste as nutty.
- Parmesan — this sharpens the top and helps it form that browned, salty crust. Grated parmesan works better than the shelf-stable powder here.
- Maple syrup, cinnamon, and nutmeg — these don’t turn it into dessert. They echo the sweetness already in the potatoes and make the cream taste warmer and deeper.
- Fresh thyme and garlic — thyme keeps the dish savory, and garlic cuts through the richness so the sauce doesn’t taste flat.
How to Layer, Bake, and Finish the Dish Without Breaking the Sauce
Build the Cream Before It Hits the Pan
Whisk the cream, milk, garlic, maple syrup, thyme, cinnamon, nutmeg, salt, and pepper together before you assemble anything. That way every layer gets seasoned, and you’re not trying to season the dish after the potatoes have already started absorbing liquid. If the mixture tastes a little bold at this stage, that’s correct. The potatoes will mellow it as they bake.
Stack the Potatoes in Tight, Overlapping Rows
Lay the slices in overlapping rows so the cream can move between the layers instead of pooling at the bottom. Pour the liquid evenly over the whole dish, then gently tilt the pan if you need to help it settle. If the top looks dry before it goes into the oven, add a small splash more cream rather than assuming it will fix itself later.
Cover for Tenderness, Then Uncover for the Crust
Bake tightly covered with foil until the potatoes are starting to soften. This first stage is about steam, not browning. When they’re nearly tender, pull the foil off and add the Gruyere and parmesan. The cheese should melt into the top and turn golden at the edges, not sit there pale and oily.
Let the Pan Rest Before Serving
Give the dish 10 minutes before you cut into it. The sauce thickens as it sits, and that short rest keeps the layers from sliding apart when you serve them. If you cut it straight from the oven, the sauce will look loose even if the potatoes are fully cooked.
How to Adapt This for a Different Table
Dairy-Free Version That Still Feels Creamy
Use full-fat canned coconut milk in place of the cream and milk, and swap in a good melting dairy-free cheese if you want the top to brown. The flavor shifts a little sweeter and richer, but the layered texture still works. Skip the parmesan if your substitute is already salty.
No Gruyere on Hand
Use Swiss, fontina, or a mild white cheddar. Fontina melts the smoothest, while cheddar gives you a sharper finish and a slightly less elegant melt. You’ll still get a browned top, but the flavor will lean less nutty.
Make-Ahead Assembly
Assemble the dish up to a day ahead, cover it tightly, and refrigerate it before baking. Add about 10 extra minutes to the covered bake since it’s starting cold. The top still browns well, but the potatoes need a little more time to come all the way through.
Smaller, Richer Holiday Style
Cut the recipe in half and bake it in an 8×8 dish for a smaller crowd. The deeper layer of potatoes gives you more of the creamy middle in each serving, and the cheese-to-potato ratio feels a little more indulgent. Keep an eye on the uncovered bake so the top doesn’t darken too fast.
Storage and Reheating
- Refrigerator: Store leftovers covered for up to 4 days. The sauce will thicken as it chills, which is normal.
- Freezer: It freezes, but the texture gets softer after thawing. If you freeze it, wrap portions tightly and thaw overnight in the fridge before reheating.
- Reheating: Reheat covered at 325F until hot through, then uncover for the last few minutes if you want the top to crisp again. Microwave reheating works in a pinch, but it softens the layers and mutes the browned top.
Answers to the Questions Worth Asking

Scalloped Sweet Potatoes
Ingredients
Equipment
Method
- Preheat oven to 375F and butter a 9x13 baking dish with the unsalted butter.
- Whisk heavy cream, whole milk, minced garlic, maple syrup, fresh thyme, cinnamon, nutmeg, salt, and pepper until smooth.
- Layer sweet potato slices in overlapping rows in the baking dish so the slices sit nearly flat.
- Pour the cream mixture over the sweet potatoes evenly, filling gaps between layers.
- Cover tightly with foil and bake 40 minutes to set the custard.
- Uncover and scatter Gruyere cheese and parmesan over the top in an even layer.
- Bake 20-25 more minutes at 375F until sweet potatoes are completely tender and the topping is golden and bubbly.
- Rest 10 minutes before serving to help the layers set for clean slices.