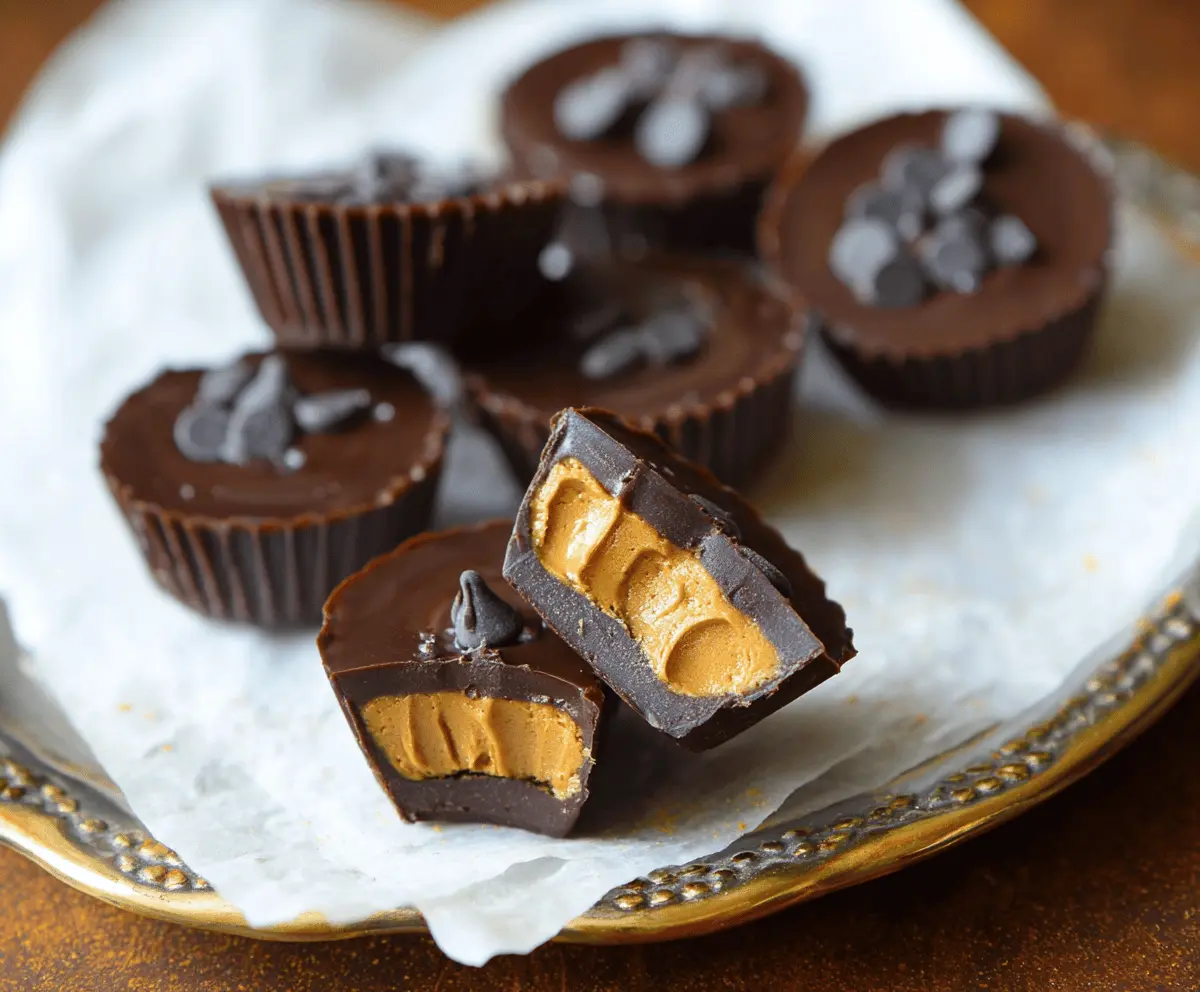
These Dairy Free Chocolate Pumpkin Butter Cups are a tasty and fun treat! With a creamy pumpkin filling wrapped in rich chocolate, they are sure to please everyone, even those with dairy allergies.
Making these cups is a breeze! I love how you can enjoy the pumpkin spice flavor without the guilt. Perfect for a snack or dessert, I usually keep some stashed away for a little pick-me-up! 🎃🍫
Key Ingredients & Substitutions
Dairy-Free Dark Chocolate Chips: These chips provide richness and a chocolatey flavor without the dairy. If you can’t find them, semi-sweet chocolate is a great substitute. Look for brands that clearly label as dairy-free.
Pumpkin Puree: Unsweetened canned pumpkin puree gives great flavor and texture. If you’re feeling adventurous, you could use homemade pumpkin puree. Just roast a pumpkin, scoop out the flesh, and blend it!
Nut or Seed Butter: Almond butter is my go-to for a creamy filling, but you can swap in peanut butter, cashew butter, or sunflower seed butter for a nut-free option. Each will bring its own unique flavor.
Sweetener: I adjust the sweetness to my liking, so feel free to alter the amount of powdered sugar or maple syrup. For a healthier touch, try using agave or honey, if you aren’t vegan.
Pumpkin Pie Spice: This spice blend is fantastic for capturing that fall flavor! If you don’t have it, combine cinnamon, nutmeg, and ginger for a homemade equivalent.
How Do I Get the Chocolate to Set Perfectly?
Getting that chocolate just right is crucial for delicious butter cups! Here’s how to do it well:
- Start by melting the chocolate slowly in the microwave, stirring often. This prevents it from burning and ensures smoothness.
- Spread a thin layer along the base and sides of your muffin molds, creating a nice shell. Don’t skimp on this layer!
- Don’t rush the chilling part! Freezing the chocolate for 10-15 minutes ensures it hardens properly before adding the pumpkin filling.
- When topping with chocolate, make sure to cover the filling completely to seal in moisture and flavor.
By following these steps, you’ll achieve beautiful, firm butter cups everyone will love! Enjoy the process and the tasty results! 🍬
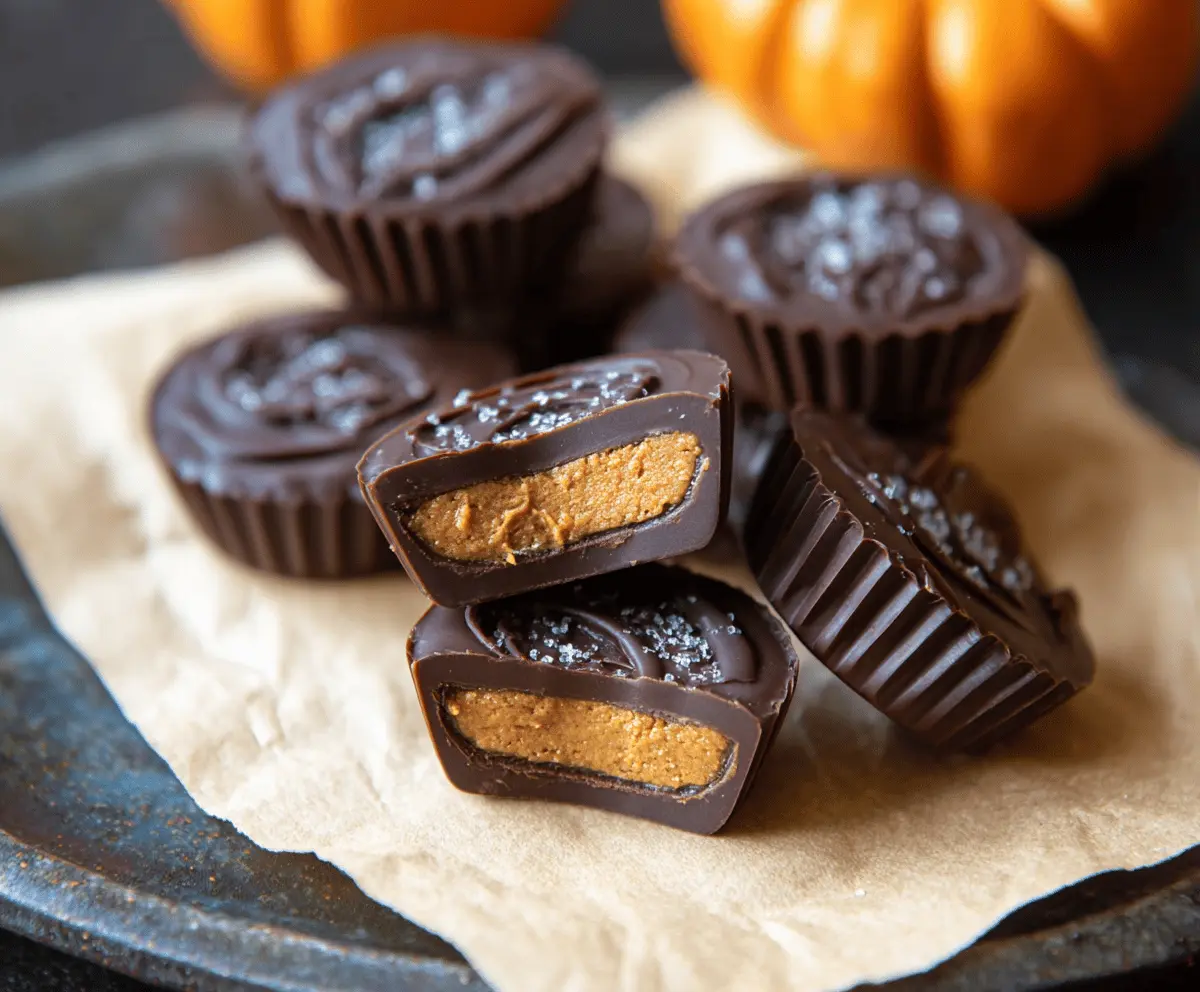
Dairy Free Chocolate Pumpkin Butter Cups
Ingredients You’ll Need:
- 1 cup dairy-free dark chocolate chips
- 1/2 cup canned pumpkin puree (unsweetened)
- 1/4 cup creamy almond butter (or any nut/seed butter)
- 2-3 tbsp powdered sugar or maple syrup (to taste)
- 1 tsp pumpkin pie spice
- 1/2 tsp vanilla extract
- Pinch of salt
- Optional: extra dairy-free chocolate chips for topping
How Much Time Will You Need?
This recipe takes about 20 minutes of prep time and an additional 40-60 minutes for chilling. So, you’ll be enjoying delicious treats in no time, with most of the time spent waiting for the cups to set!
Step-by-Step Instructions:
1. Prepare the Muffin Tin:
Begin by lining a mini muffin tin or silicone mold with paper liners. If you prefer, you can lightly grease the molds to help with easy removal later.
2. Melt the Chocolate:
In a microwave-safe bowl, melt 1/2 cup of the dairy-free chocolate chips in 20-second increments. Stir after each increment until the chocolate is completely smooth.
3. Build the Chocolate Base:
Spoon a small amount of the melted chocolate into the bottom of each muffin cup, using the back of the spoon to gently spread it up the sides. Make sure to save the remaining melted chocolate for later!
4. Chill the Chocolate:
Place the muffin tin in the freezer for about 10-15 minutes to allow the chocolate to harden properly.
5. Make the Pumpkin Filling:
While the chocolate base is chilling, combine the pumpkin puree, almond butter, powdered sugar (or maple syrup), pumpkin pie spice, vanilla extract, and a pinch of salt in a mixing bowl. Stir together until smooth and creamy. Taste and adjust sweetness as needed.
6. Fill the Chocolate Cups:
Once the chocolate base is hardened, remove the muffin tin from the freezer. Add about a tablespoon of the pumpkin filling into each cup, smoothing the tops with a spoon to make it even.
7. Top with More Chocolate:
Now melt the remaining 1/2 cup chocolate chips until smooth. Spoon the melted chocolate over the pumpkin filling in each cup, making sure to cover it completely. If you like, sprinkle a few extra chocolate chips on top for a decorative touch!
8. Final Chill:
Return the cups to the freezer for at least 30 minutes, or until they are fully set and hardened.
9. Remove and Store:
Once set, carefully remove the cups from the liners. Store the treats in an airtight container in the fridge or freezer until you’re ready to enjoy! They’re delicious chilled or at room temperature.
Enjoy your homemade Dairy Free Chocolate Pumpkin Butter Cups! They make for a delightful and seasonal treat that everyone can enjoy! 🎃🍫
Can I Use Different Types of Nut Butters?
Absolutely! While almond butter is a great choice, you can use peanut butter, cashew butter, or sunflower seed butter for a nut-free option. Each will add its own unique flavor to the filling!
How Should I Store the Chocolate Pumpkin Butter Cups?
Store any leftover cups in an airtight container. They can be kept in the fridge for up to a week or in the freezer for a couple of months. Just make sure to let them thaw in the fridge before enjoying if frozen!
What Can I Use Instead of Pumpkin Pie Spice?
If you don’t have pumpkin pie spice on hand, you can make your own by mixing cinnamon, nutmeg, and ginger. A simple blend of 1 tsp cinnamon, 1/4 tsp nutmeg, and 1/4 tsp ginger works well!
Can I Make These Ahead of Time?
Yes! These cups can be made a few days in advance. Just store them in the fridge, and they’ll be ready for you whenever a sweet craving hits!