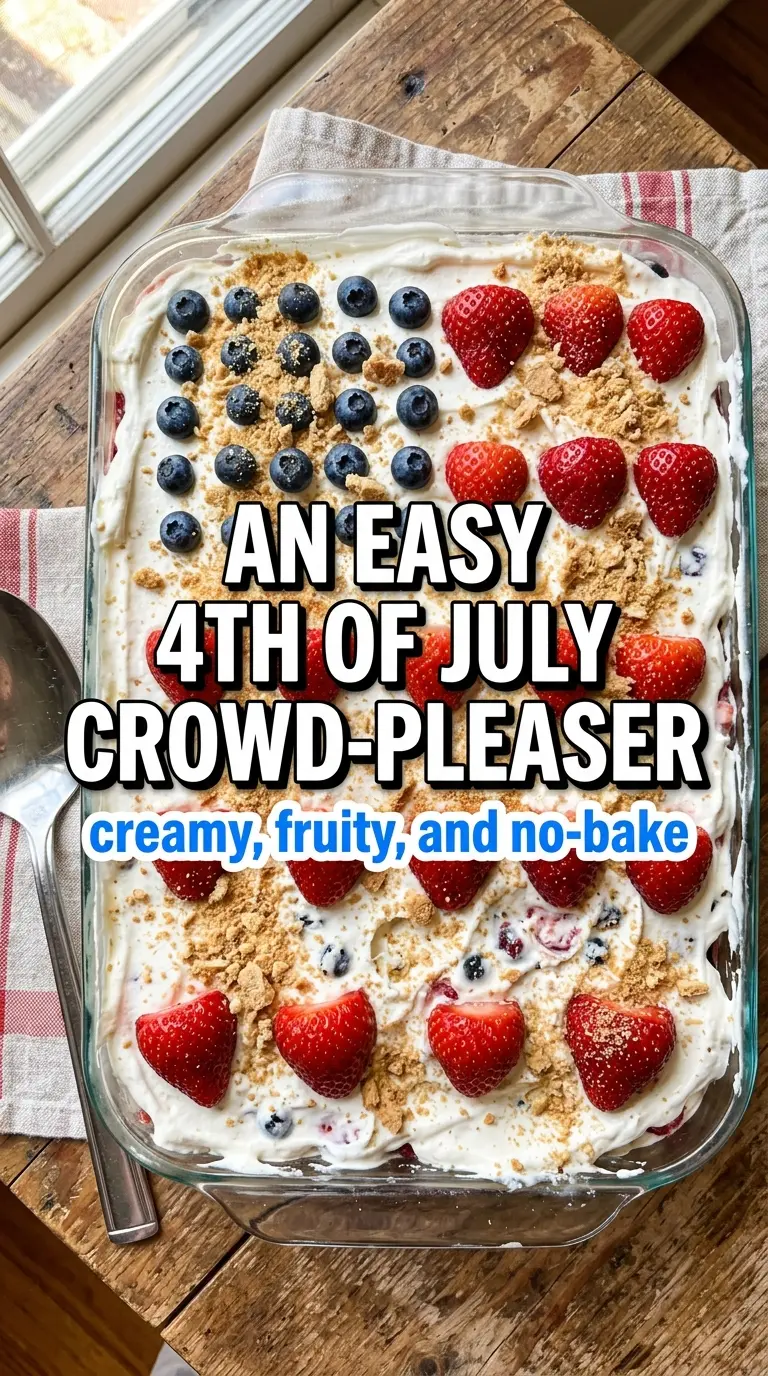
Layers of cool cream, buttery crumb crust, and fresh berries make this dessert disappear fast. The texture is the whole appeal here: a firm graham base, a smooth cream cheese layer, and juicy strawberries and blueberries that stay bright instead of sinking into the filling. It slices cleanly after a proper chill, which is what turns a simple no-bake pan dessert into something people go back for with a second serving.
The trick is keeping each layer distinct. The crust needs enough butter to pack and hold, but not so much that it turns greasy. The cream cheese filling has to be beaten until completely smooth before the whipped topping goes in, because any lumps will show once you spread it over the crust. After that, the dessert only needs time in the refrigerator to set up into neat, creamy layers.
Below you’ll find the small details that matter most: how to keep the crust from crumbling, how to spread the filling without tearing it up, and how to arrange the berries so the top looks finished without turning soggy.
The filling turned out smooth and fluffy, and the berries stayed in place after chilling. I liked that the crust held together when sliced, even after sitting on the table for a while.
Layer the creamy berry topping into a Red, White and Blue Mixed Berry Yum Yum that chills into neat, picnic-ready squares.
The Crust Has to Pack Tight Before the Cream Goes On
A no-bake dessert only works when the base holds together on its own. If the graham crumbs are too dry, the crust crumbles when you cut the first square. If they’re too wet, the base turns dense and greasy instead of tender. The sweet spot is a mixture that feels like damp sand and presses into the pan without sticking to your fingers.
That first layer also sets the tone for every bite that comes after it. Press it firmly and evenly all the way into the corners so the filling sits on a level surface. A flat crust gives you clean layers, and clean layers are what make this dessert look polished instead of messy.
What Each Ingredient Is Actually Doing in This Dessert
- Graham cracker crumbs — These create the base and give the dessert its structure. Freshly crushed crumbs work fine, and store-bought crumbs are just as useful here. If you only have whole crackers, crush them finely so the crust packs evenly.
- Unsalted butter — This is what binds the crumbs into a sliceable crust. Salted butter will work in a pinch, but unsalted gives you more control over the final flavor. Melt it fully so every crumb gets coated.
- Cream cheese — This brings the tangy, cheesecake-like layer that balances the sweet crust and whipped topping. Let it soften all the way before mixing or you’ll end up with little lumps that won’t disappear later. Full-fat cream cheese gives the best texture.
- Powdered sugar — It sweetens the filling without leaving graininess. Granulated sugar doesn’t dissolve the same way, so it won’t give you that smooth, fluffy finish. Sift it if yours is clumpy.
- Whipped topping — This lightens the filling and gives the dessert its airy, mousse-like texture. Homemade whipped cream can be used, but it won’t hold as long in the fridge, so the dessert will soften sooner. Fold it in gently so the filling stays fluffy.
- Fresh strawberries and blueberries — These are more than decoration. They add freshness, color, and a little tartness that keeps the dessert from tasting flat. Slice the strawberries evenly so the top layer looks neat and the berries sit without rolling around.
Building the Layers Without Smearing the Whole Pan
Pressing and Chilling the Crust
Mix the graham cracker crumbs with the melted butter until every crumb looks coated, then press the mixture firmly into the bottom of a 9×13-inch dish. Use the bottom of a measuring cup or glass to compact it into an even layer. If it looks loose now, it will fall apart later. A brief chill while you mix the filling helps the crust set enough to handle the cream layer.
Whipping the Filling Until It Turns Smooth
Beat the softened cream cheese and powdered sugar together until the mixture looks completely smooth and no streaks remain. This is the moment that decides whether the filling tastes silky or grainy. Fold in half of the whipped topping by hand so you don’t knock all the air out of it. If you stir too aggressively, the filling turns heavy and less spreadable.
Arranging the Berries and Finishing the Top
Spread the cream cheese layer evenly over the crust, then arrange the strawberries and blueberries in a pattern that covers the surface without piling them too thick. Press them lightly into the filling so they stay in place after chilling. Add the remaining whipped topping over or around the berries, depending on how much of the fruit you want visible. Chill for at least 2 hours, and longer if you want cleaner slices.
Three Ways to Make This Dessert Fit the Moment
Gluten-Free Crust
Swap in gluten-free graham-style crumbs in the same amount. The texture stays close to the original, though some brands are a little sandier, so press the crust especially firmly into the pan.
Fresh Whipped Cream Version
Replace the whipped topping with freshly whipped cream if you want a softer, more homemade finish. It tastes great, but the dessert won’t hold as long in the fridge, so serve it the same day for the best texture.
Lower-Sugar Version
Cut the powdered sugar slightly and lean on the berries for more of the sweetness. The filling will taste a little tangier and less dessert-like, which works well if you want the fruit to stand out more.
Make-Ahead Storage
Refrigerator: Store covered for up to 3 days. The crust softens a little as it sits, but the flavor stays good. Freezer: This one doesn’t freeze well because the berries and creamy filling lose their texture after thawing. Reheating: Not needed; serve it straight from the fridge, and slice it after a short rest so it isn’t too stiff.
Answers to the Questions Worth Asking
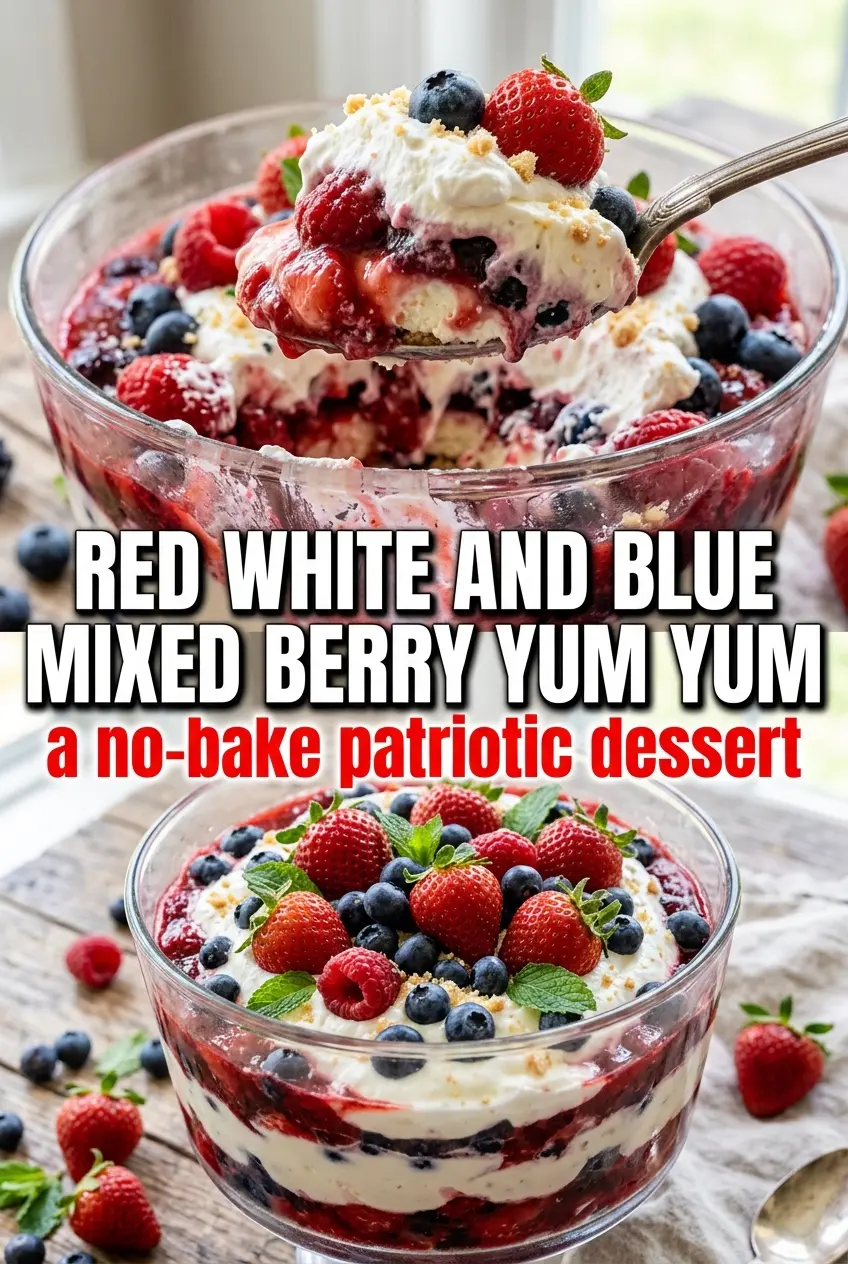
Red, White and Blue Mixed Berry Yum Yum
Ingredients
Equipment
Method
- Combine the graham cracker crumbs and melted butter, then press into the bottom of a 9x13-inch dish.
- Set the crust aside while you prepare the filling.
- Beat the cream cheese and powdered sugar together until smooth, then fold in half of the whipped topping.
- Spread the cream cheese mixture evenly over the crust.
- Arrange the sliced strawberries and blueberries in a decorative pattern over the cream cheese layer.
- Top with the remaining whipped topping.
- Chill for at least 2 hours before slicing and serving, until set and sliceable.