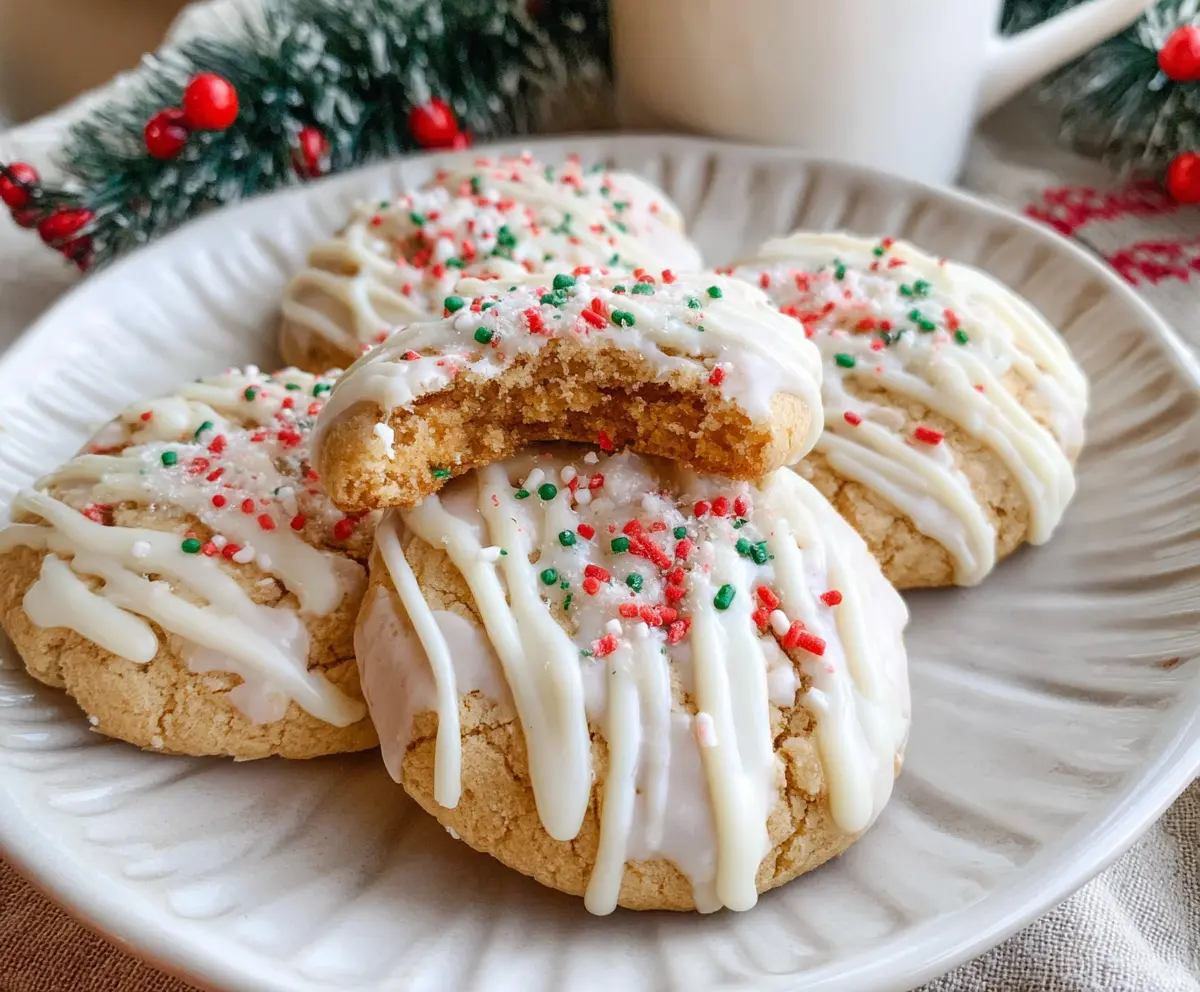
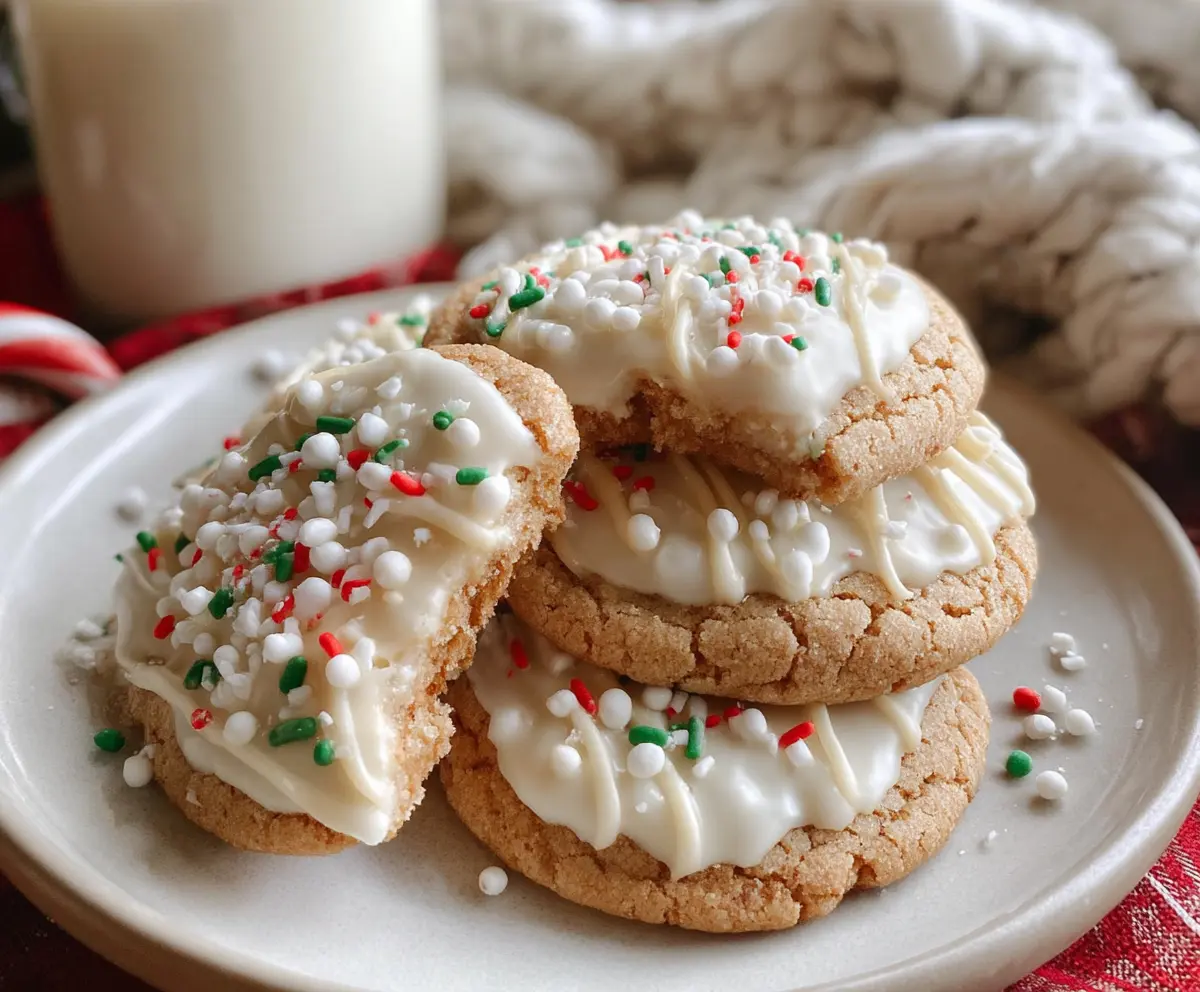
These White Chocolate Covered Eggnog Cookies are soft, festive treats perfect for the holidays. With a creamy white chocolate layer, they bring cozy eggnog flavors to every bite!
Honestly, who can resist cookies with eggnog? They’re like a warm hug for your taste buds! I love sharing them with friends—they always come back for seconds! 😊
Key Ingredients & Substitutions
All-Purpose Flour: This is essential for the cookies’ structure. If you’re gluten-free, a 1:1 baking blend works well. Just make sure it’s a decent brand for the best results!
Eggnog: Full-fat eggnog gives the cookies a rich flavor. If you can’t find it, a combination of milk and a bit of vanilla and nutmeg can mimic it. You could also use dairy-free eggnog for a lighter option!
White Chocolate: I love using real white chocolate; it melts and sets beautifully. If you’re looking for a healthier alternative, you could use yogurt or cream cheese frosting instead—just adjust for sweetness!
Spices: Nutmeg and cinnamon are classic flavors here. If you’re out of one, just increase the other. Or experiment with pumpkin pie spice for a twist!
How Do I Ensure My Cookies Are Soft and Chewy?
The key to soft cookies lies in the mixing and baking time! Here’s how to get them just right:
- Don’t overmix after adding flour; mix just until combined.
- Flatten the dough slightly to get an even cook. That will also help them spread out nicely.
- Check them at the shorter bake time of 10 minutes. They should look slightly underbaked; they’ll firm up as they cool.
Also, letting them cool on the baking sheet for a few minutes helps retain softness while they set. Happy baking!
How to Make White Chocolate Covered Eggnog Cookies
Ingredients You’ll Need:
For the Cookies:
- 2 cups all-purpose flour
- 1/2 teaspoon baking powder
- 1/4 teaspoon salt
- 1/2 teaspoon ground nutmeg
- 1/4 teaspoon ground cinnamon
- 1/2 cup unsalted butter, softened
- 3/4 cup granulated sugar
- 1 large egg
- 1 teaspoon vanilla extract
- 1/2 cup eggnog (preferably full-fat for richness)
For the White Chocolate Glaze:
- 6 oz white chocolate chips or chopped white chocolate
- 1 teaspoon vegetable oil or coconut oil (optional, for smoother glaze)
For Decoration:
- Red, green, and white sprinkles (holiday-themed)
How Much Time Will You Need?
This recipe takes about 15 minutes for prep and roughly 12 minutes to bake—plus some time for cooling and setting. In total, plan for around 1 hour and 30 minutes to enjoy these delicious cookies fresh from the oven!
Step-by-Step Instructions:
1. Preheat the Oven:
Start by preheating your oven to 350°F (175°C). Line two baking sheets with parchment paper to prevent sticking. This makes clean-up a breeze!
2. Mix the Dry Ingredients:
In a medium bowl, whisk together the flour, baking powder, salt, nutmeg, and cinnamon until well combined. This mix adds delicious flavor and helps the cookies rise!
3. Cream the Butter and Sugar:
In a large bowl, cream the softened butter and granulated sugar together using a mixer until the mixture is light and fluffy. This usually takes about 2-3 minutes and makes your cookies soft and tender!
4. Add Egg and Vanilla:
Next, beat in the egg and vanilla extract until everything is well mixed. The vanilla adds a lovely aroma and flavor to the cookies.
5. Combine Wet and Dry Ingredients:
Gradually add the dry ingredients to your wet mixture, alternating with the eggnog. Start and finish with the dry mix. Stir just until combined—don’t overmix!
6. Form the Cookies:
Using a cookie scoop or tablespoon, drop rounded dough balls onto the prepared baking sheets, spacing them about 2 inches apart. Gently flatten each ball with the bottom of a glass or your hand to create round discs. This helps them bake evenly!
7. Bake the Cookies:
Bake the cookies in your preheated oven for 10-12 minutes, or until the edges turn lightly golden and tops crack slightly. Keep an eye on them; you want them soft but set!
8. Cool the Cookies:
Once baked, remove the cookies from the oven and let them cool on the baking sheet for about 5 minutes. Then transfer them to a wire rack to cool completely. This makes sure they don’t get soggy.
9. Prepare the White Chocolate Glaze:
While the cookies are cooling, melt the white chocolate chips with the oil in a microwave-safe bowl. Heat in short bursts of 20-30 seconds, stirring in between until smooth and creamy.
10. Glaze the Cookies:
Once cooled, dip the tops of the cookies into the melted white chocolate glaze or use a spoon to drizzle it over. Get a nice coat on there for that sweet touch!
11. Add the Sprinkles:
Before the glaze sets, sprinkle the colorful holiday sprinkles generously on top. They’ll stick perfectly when the chocolate is still wet!
12. Let It Set:
Allow the glaze to harden at room temperature. You can also refrigerate them briefly if you’d like to speed things up. Then they’re all set for devouring!
Enjoy these delightful White Chocolate Covered Eggnog Cookies to celebrate the holiday season! They’re perfect for sharing (or keeping all to yourself)! 🎉
Can I Use a Different Type of Chocolate for the Glaze?
Absolutely! If you’re not a fan of white chocolate, you can use milk or dark chocolate instead. Just make sure to adjust the melting method as dark chocolate may require slightly different timing.
How Should I Store Leftover Cookies?
Keep leftover cookies in an airtight container at room temperature for up to 5 days. If you prefer, you can also store them in the fridge to prolong freshness—just make sure to let them come to room temperature before enjoying!
Can I Make These Cookies in Advance?
Yes! You can prepare the dough ahead of time and refrigerate it for up to 3 days before baking. Just let it soften at room temperature for about 30 minutes before scooping and baking.
Can I Add Nuts or Other Mix-ins?
Definitely! Chopped pecans or walnuts would be a great addition for extra texture. You could also fold in chocolate chips, dried cranberries, or coconut flakes to customize your cookies further.