These Twix Candy Bar Bites are a fun treat! They combine crunchy biscuits, creamy caramel, and smooth chocolate all in one bite-sized piece. Perfect for sharing, or maybe not! 😋
I love making these when I want a quick snack that feels fancy. Plus, they’re super easy to whip up. You can enjoy them any time your sweet tooth calls! Who can resist chocolate, right?
Key Ingredients & Substitutions
Unsalted Butter: This is crucial for the cookie base. You could substitute it with coconut oil if you want a dairy-free option. I personally like using butter for the rich flavor!
Caramel Candies: If you can’t find soft caramel candies, you can use homemade caramel or even dulce de leche. For a healthier twist, consider using nut butters mixed with a bit of honey instead.
Chocolate Chips: Milk chocolate gives a classic taste, but semi-sweet offers a richer flavor. Dark chocolate is also a fantastic choice if you prefer it less sweet.
How Do I Keep My Chocolate Coating Smooth?
A key step for a great chocolate coating is to melt it correctly. Working in short intervals in the microwave helps prevent it from burning. Here’s how:
- Use a glass or ceramic bowl for melting.
- Microwave in 20-second bursts, stirring in between until just melted.
- If it’s too thick, add a teaspoon of vegetable oil, shortening, or extra butter while stirring.
- Keep your bites on a wire rack for better cooling. This way, they won’t stick!
Happy cooking with these easy tips to enhance your Twix Candy Bar Bites experience!
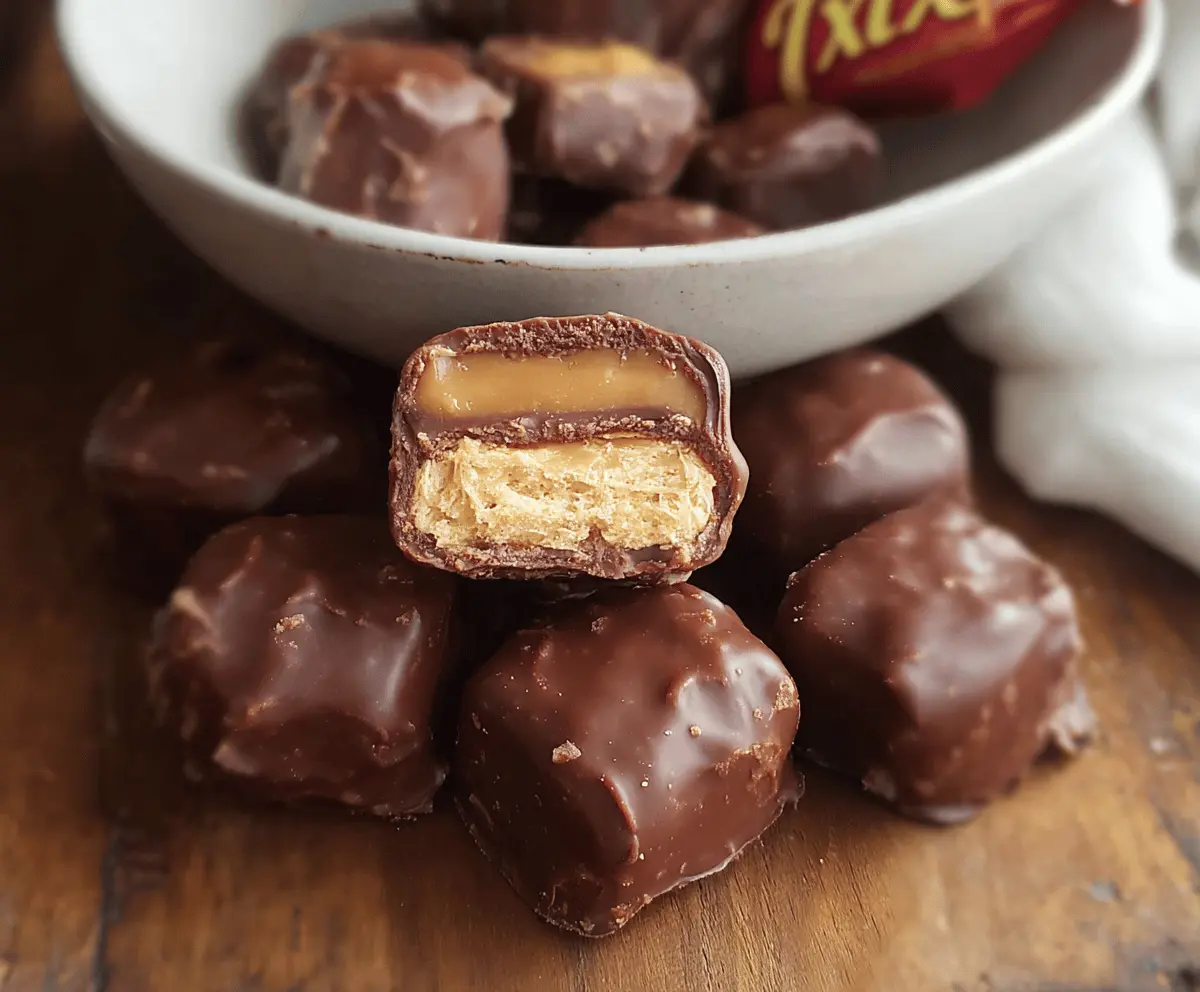
How to Make Twix Candy Bar Bites
Ingredients List:
For the Cookie Base:
- 1 cup unsalted butter, softened
- 1/2 cup granulated sugar
- 2 cups all-purpose flour
- 1/4 teaspoon salt
For the Caramel Layer:
- 14 oz caramel candies (soft caramel bits or unwrapped squares)
- 2 tablespoons heavy cream or milk
For the Chocolate Coating:
- 12 oz milk chocolate or semi-sweet chocolate chips (or chocolate melting wafers)
- Optional: extra butter or shortening for thinning the chocolate
Time Needed:
This easy recipe takes about 15 minutes to prepare and around 30 minutes to chill in the freezer. Plan for additional time for baking (about 20 minutes), and around 15-20 minutes for coating and setting the chocolate. All in all, you’re looking at about 1 hour total to enjoy these delightful treats!
Step-by-Step Instructions:
1. Make the Cookie Base:
First, preheat your oven to 350°F (175°C). In a medium bowl, start by creaming together the softened butter and granulated sugar until the mixture is light and fluffy. It should look smooth and pale.
Next, gradually mix in the flour and salt. Mix until you form a smooth dough. Then, take your dough and press it evenly into a parchment-lined or greased 8×8 inch baking pan.
2. Bake the Base:
Place the pan in the oven and bake for about 18-20 minutes, or until the edges are lightly golden. Once done, take it out and allow it to cool completely. This is important, so the caramel doesn’t melt the cookie base!
3. Prepare the Caramel Layer:
While your cookie base is cooling, it’s time for the fun part. In a microwave-safe bowl, combine the caramel candies with the heavy cream. Microwave in 20-second intervals, stirring after each interval until your mixture is smooth and melted. It should be nice and gooey!
4. Assemble the Layers:
Now, pour the melted caramel over the cooled cookie base, spreading it out evenly. After that, place the pan in the freezer for about 30 minutes to firm up the caramel layer. This step helps keep everything layered nicely!
5. Cut and Coat:
Once the caramel layer is firm, cut the cookie-caramel slab into bite-size squares or rectangles. In another bowl, melt the chocolate in 20-second intervals, stirring until melted and smooth. If it’s too thick, you can add a little butter or shortening to make it easier for dipping.
6. Dip and Set:
Now for the final touch! Use forks or a dipping tool to dip each bite into the melted chocolate, ensuring it’s fully coated. Place the coated bites on a parchment-lined tray to set. Refrigerate them for about 15-20 minutes until the chocolate hardens.
7. Enjoy:
Your Twix Candy Bar Bites are now ready! You can serve them chilled or at room temperature. If you have leftovers (which is unlikely!), store them in an airtight container in the fridge.
Enjoy your homemade Twix Candy Bar Bites—crunchy, chewy, and utterly chocolatey!

Can I Use Different Types of Chocolate?
Absolutely! While milk chocolate gives that classic Twix flavor, you can also use semi-sweet or dark chocolate for a richer taste. If you’re feeling adventurous, try adding some flavored chocolate, like sea salt caramel chocolate, for a unique twist!
Can I Make These Vegan?
Yes! To make these bites vegan, substitute the butter with a plant-based alternative, like coconut oil or vegan butter. Use dairy-free chocolate chips and replace the heavy cream with coconut cream or almond milk to maintain the creaminess of the caramel layer.
How to Store Twix Candy Bar Bites?
Store any leftovers in an airtight container in the fridge for up to a week. If you want to keep them fresh longer, they can be frozen for up to 3 months. Just layer them between parchment paper to prevent sticking!
Can I Add Nuts or Other Fillings?
Definitely! Consider adding chopped nuts like pecans or walnuts to the cookie base for extra crunch. You could also layer in some peanut butter or nutella between the cookie and caramel layers for an added flavor dimension.