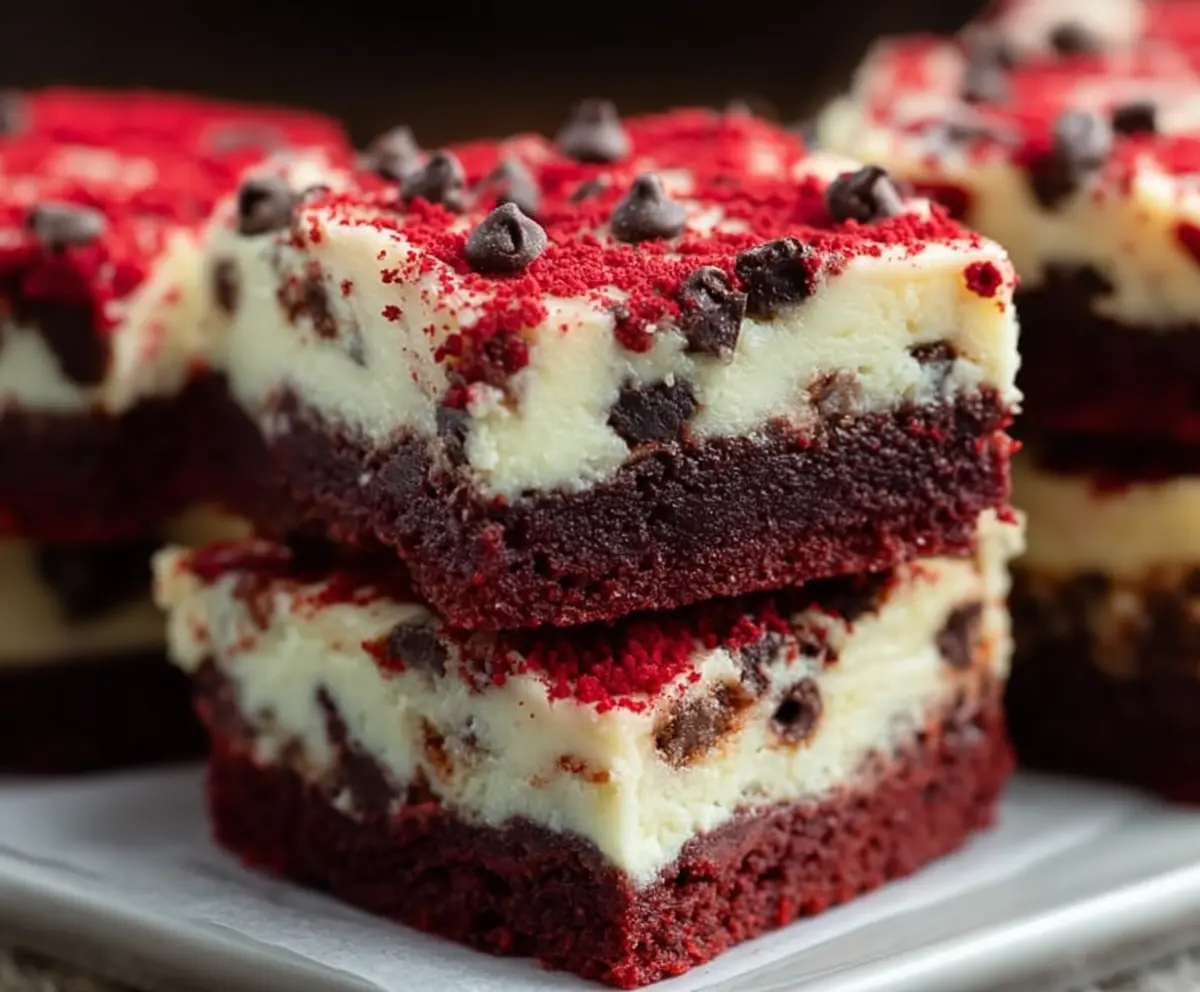
These Red Velvet Chocolate Chip Cheesecake Bars are a delightful treat to brighten your day! With a rich red velvet base and creamy cheesecake filling dotted with chocolate chips, they are simply irresistible.
Honestly, who can say no to bright red bars filled with sweet surprises? I love cutting these into small squares and sharing them (or not, no judgment here!). They’re perfect for any celebration or just because!
Key Ingredients & Substitutions
All-Purpose Flour: The base for both layers, providing structure. You can swap it with a gluten-free flour blend for a gluten-free option.
Unsweetened Cocoa Powder: This adds rich chocolate flavor. If you’re out, carob powder can work in a pinch, but the flavor will be different.
Red Food Coloring: Essential for that bright red color. You can use natural alternatives like beet juice for coloring, although it may not have the same vibrant hue.
Buttermilk: Adds moisture and tang. If you don’t have buttermilk, you can make a quick substitute using milk mixed with vinegar or lemon juice (1 cup milk – 1 tbsp vinegar, let sit for 5 mins).
Mini Chocolate Chips: Perfect for those gooey bites in the cheesecake layer. If you prefer dark chocolate or white chocolate chips, feel free to swap them out!
How Do I Bake the Cheesecake Layer Perfectly?
Baking the cheesecake layer requires some care to achieve the right texture. You want it to be creamy but fully set. Here’s how:
- Beat cream cheese and sugar until smooth, ensuring no lumps are left. This creates a silky filling.
- Add eggs one at a time, mixing gently after each. Overmixing can cause air bubbles, leading to cracks.
- Use a water bath if you want even creaminess. Just place your pan into a larger pan with water while baking.
Remember not to open the oven during baking as this can cause the cheesecake to sink. Once it’s done, let it cool slowly to avoid cracking!
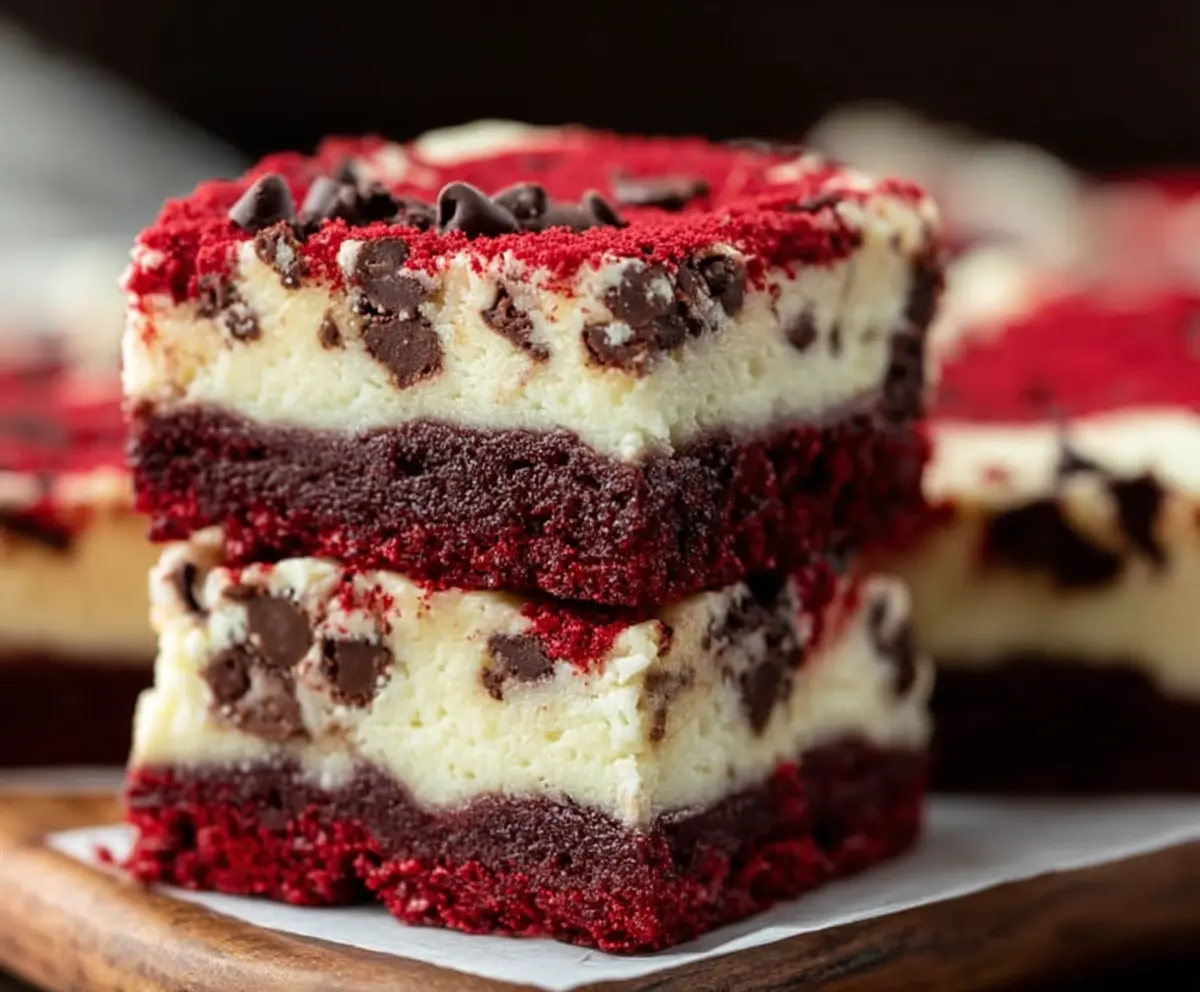
Red Velvet Chocolate Chip Cheesecake Bars
Ingredients You’ll Need:
For the Red Velvet Layer:
- 1 cup all-purpose flour
- 1/2 cup unsweetened cocoa powder
- 1/2 tsp baking powder
- 1/4 tsp salt
- 1/2 cup (1 stick) unsalted butter, melted
- 1 cup granulated sugar
- 1 large egg
- 2 tbsp buttermilk
- 1 tbsp red food coloring
- 1 tsp vanilla extract
- 1 tsp white vinegar
For the Cheesecake Layer:
- 16 oz (450 g) cream cheese, softened
- 2/3 cup granulated sugar
- 2 large eggs
- 1 tsp vanilla extract
- 1 cup mini chocolate chips (plus extra for topping)
For Topping:
- 2 tbsp red velvet cake crumbs (reserved from red velvet layer batter or crumbled cake)
How Much Time Will You Need?
This recipe takes about 15 minutes of prep time, plus 45 minutes of baking, and then a chilling time of at least 3 hours (or overnight) before serving. In total, plan for around 4 hours, but most of that is just waiting while it cools!
Step-by-Step Instructions:
1. Preheat the Oven:
Start by preheating your oven to 350°F (175°C). While that warms up, line a 9×9-inch baking pan with parchment paper or grease it well with cooking spray. This will keep your bars from sticking!
2. Make the Red Velvet Layer:
In a medium bowl, whisk together the flour, cocoa powder, baking powder, and salt. This mixes in the dry ingredients nicely. Next, take a larger bowl and combine the melted butter with the granulated sugar, stirring until it’s well mixed. Now, add the egg, buttermilk, red food coloring, vanilla extract, and white vinegar. Mix this until everything is combined.
3. Combine the Mixtures:
Slowly add the dry ingredients into the wet mixture, stirring gently until just combined. You want to keep the batter fluffy! Reserve about 2 tablespoons of this red velvet batter to crumble on top later. Now pour the rest into your prepared pan and spread it evenly.
4. Bake the Base:
Place the pan in the oven and bake for about 12 minutes. This will set the red velvet layer slightly, so it’s ready for the cheesecake topping.
5. Prepare the Cheesecake Layer:
While your base bakes, grab another bowl to make the cheesecake layer. Beat the softened cream cheese and sugar together with a mixer until it’s smooth and creamy. Then, add the eggs one by one, mixing well after each addition. Finally, stir in the vanilla extract and fold in the mini chocolate chips.
6. Assemble and Bake Again:
Once the red velvet base is done baking, pour the cheesecake mixture over the top, spreading it out evenly. Sprinkle those extra mini chocolate chips and the reserved red velvet crumbs on top for a nice finish. Now return the pan to the oven and bake for another 30-35 minutes, or until the cheesecake is set and the edges look slightly golden.
7. Cool and Chill:
Take the pan out of the oven and let it cool to room temperature. Then, cover it and place it in the refrigerator for at least 3 hours (or better yet, overnight) to let it set beautifully.
8. Serve:
When you’re ready to enjoy, cut the cheesecake bars into squares. Serve chilled and watch them disappear! These bars are a delightful treat, perfectly creamy with just the right amount of chocolate—enjoy every bite!
Can I Use a Different Type of Food Coloring?
Yes! While red food coloring is traditional for this recipe, you can use natural alternatives like beet juice or other liquid food colorings. Just keep in mind the shade may not be as vibrant.
Can I Make These Bars Gluten-Free?
Absolutely! Simply substitute the all-purpose flour with a gluten-free flour blend. Just ensure it’s a blend designed for baking to maintain the right texture.
How Should I Store Leftover Cheesecake Bars?
Store any leftover bars in an airtight container in the refrigerator for up to 5 days. You can also freeze them; just wrap each bar individually in plastic wrap and foil for up to 2 months. Thaw in the fridge before serving!
What Can I Substitute for Buttermilk?
If you don’t have buttermilk on hand, you can easily make a substitute by mixing 1 cup of milk with 1 tablespoon of vinegar or lemon juice. Let it sit for about 5 minutes, and it’s ready to use!