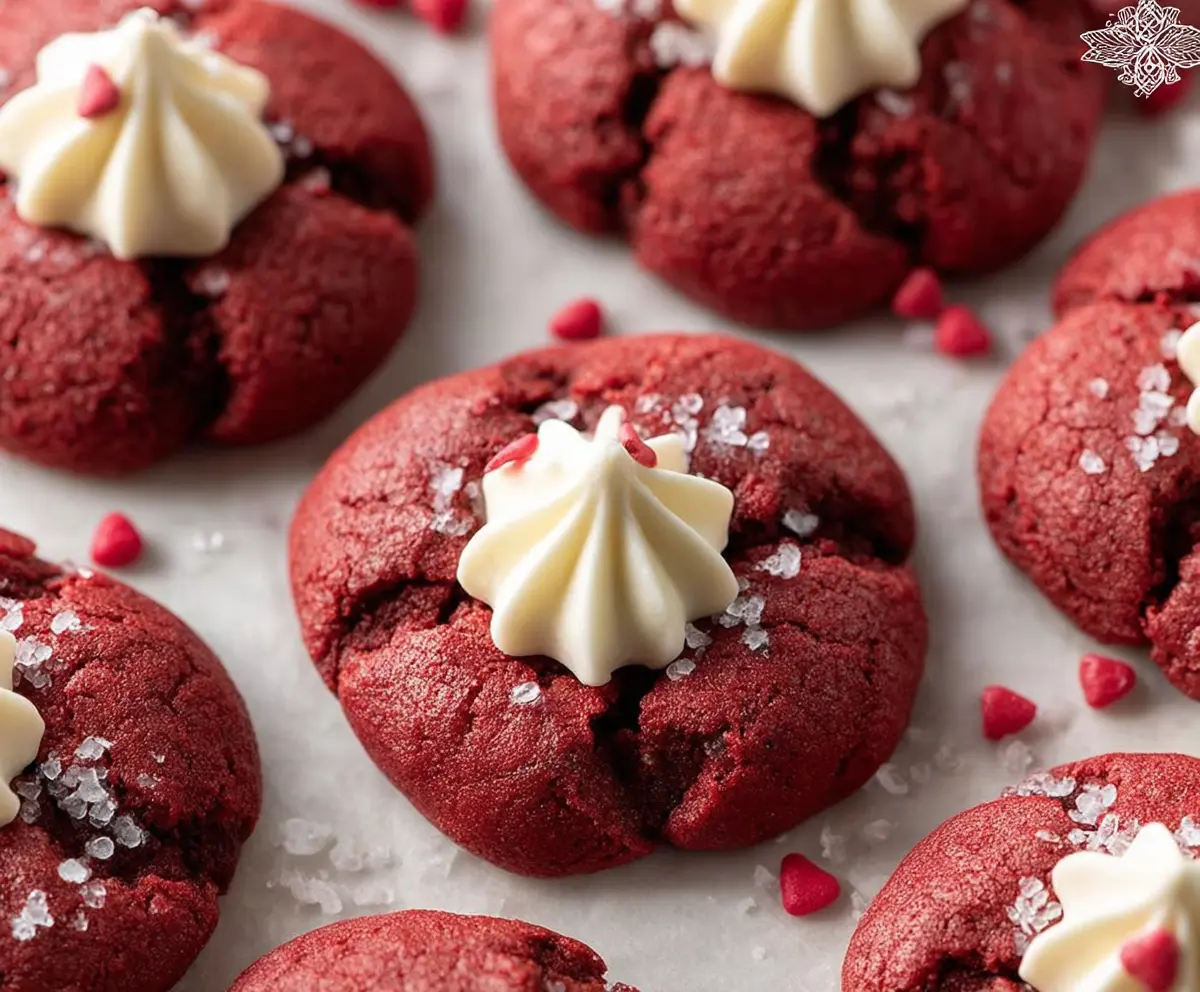
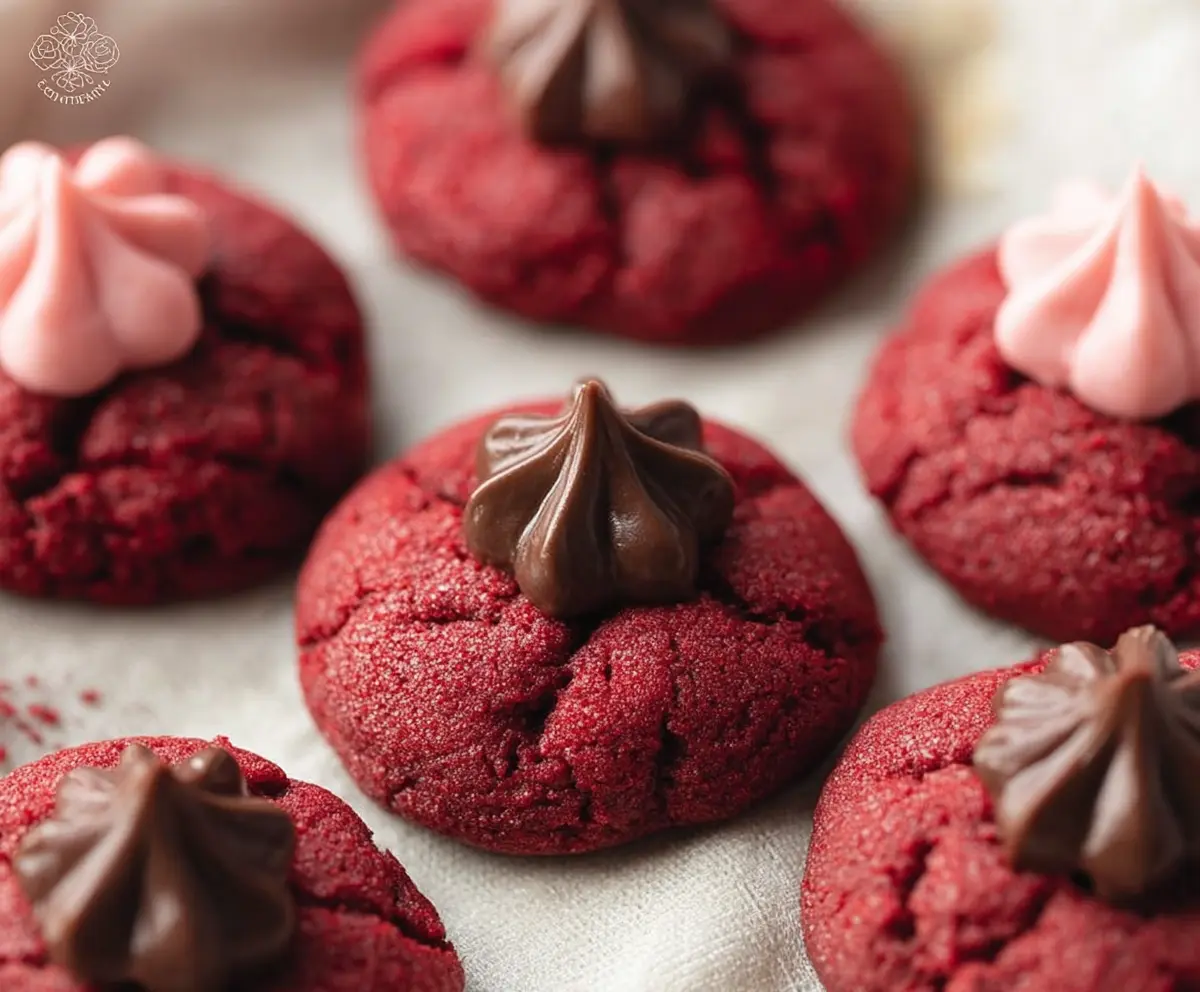
These Red Velvet Blossom Cookies are as fun as they sound! They’re soft, chewy, and have that lovely red color topped with a sweet chocolate kiss. Perfect for any occasion!
Whenever I make these, I can’t help but sneak a few before they cool down. Just a warning: they disappear fast when friends come over! 🍪❤️
Key Ingredients & Substitutions
Unsalted Butter: Softened butter gives the cookies a rich texture. If you’re out, you can use margarine or coconut oil in a pinch, but the flavor might change a bit.
Sugars: Granulated sugar and brown sugar work together for sweetness and moisture. If needed, coconut sugar can substitute brown sugar for a different flavor.
Red Food Coloring: This ingredient is essential for that iconic red color. If you prefer a natural alternative, beet juice can work, but it may change the flavor a bit.
Cocoa Powder: It enhances the chocolate flavor in these cookies. Dutch-process cocoa adds a darker taste; regular unsweetened cocoa works well too!
White Chocolate Chips: They add a lovely taste, but you can skip them or replace them with semi-sweet chocolate chips for a different twist.
How Do I Achieve the Perfect Cookie Texture?
The key to soft, chewy Red Velvet Blossom Cookies lies in mixing and baking time. Here’s how to ensure you get it just right:
- Creaming Butter and Sugars: Beat until fluffy; this helps incorporate air, making cookies light.
- Do Not Overmix: Once you combine the wet and dry ingredients, mix until just combined to maintain tenderness.
- Baking Time: Keep an eye on them; they should be set around the edges but soft in the center. Remove them from the oven when they’re just starting to firm up.
Finally, let them cool completely before frosting for the best results! Beautiful cookies await you! 🍪
How to Make Red Velvet Blossom Cookies
Ingredients You’ll Need:
For the Cookies:
- 1/2 cup (115 g) unsalted butter, softened
- 1/2 cup (100 g) granulated sugar
- 1/4 cup (50 g) packed light brown sugar
- 1 large egg
- 1 teaspoon vanilla extract
- 1 tablespoon unsweetened cocoa powder
- 1 1/2 cups (190 g) all-purpose flour
- 1/2 teaspoon baking soda
- 1/4 teaspoon salt
- 1 tablespoon red food coloring
- 1/2 cup white chocolate chips (optional, for mixing into dough)
- Coarse sugar, for sprinkling
For the Frosting:
- 4 oz (115 g) cream cheese, softened
- 1/4 cup (56 g) unsalted butter, softened
- 1 cup (120 g) powdered sugar
- 1/2 teaspoon vanilla extract
- Mini red heart sprinkles (optional, for decoration)
How Much Time Will You Need?
This delightful recipe will take about 15 minutes to prepare and about 10-12 minutes to bake. After baking, you should let the cookies cool down completely, which may take another 20-30 minutes before frosting. So, in total, plan for around 1 hour to 1 hour and 15 minutes from start to finish. Perfect for an afternoon snack or a special occasion!
Step-by-Step Instructions:
1. Preheat the Oven:
Start by preheating your oven to 350°F (175°C) and lining your baking sheets with parchment paper. This helps prevent sticking and makes cleanup easier.
2. Mix the Wet Ingredients:
In a large mixing bowl, cream together the softened butter, granulated sugar, and brown sugar. Use a mixer until the mixture is light and fluffy. This should take about 2-3 minutes. Then, beat in the egg and vanilla extract until well combined.
3. Combine the Dry Ingredients:
In a separate bowl, whisk together the flour, cocoa powder, baking soda, and salt. This helps to evenly distribute the dry ingredients.
4. Mix Wet and Dry Together:
Gradually add the dry ingredients to the butter mixture. Mix until just combined; be careful not to overmix! Now it’s time to add the red food coloring and, if you want, the white chocolate chips. Stir until the dough is evenly colored.
5. Shape the Cookies:
Scoop tablespoon-sized portions of dough onto your prepared baking sheets, spacing them about 2 inches apart. This allows room for spreading. Lightly sprinkle the tops with coarse sugar for that sweet crunch!
6. Bake the Cookies:
Pop the baking sheets into the preheated oven and bake for about 10-12 minutes. The edges should be firm, but the centers will remain soft. This is the secret to soft cookies!
7. Cool the Cookies:
Once baked, remove the cookies from the oven and cool them completely on a wire rack. This is crucial for proper frosting application.
8. Make the Frosting:
While the cookies cool, prepare the frosting. In a bowl, beat together the softened cream cheese and butter until smooth. Gradually add the powdered sugar and vanilla extract, mixing until light and fluffy.
9. Frost and Decorate:
Once the cookies are cool, transfer the frosting to a piping bag fitted with a star tip or a zip-top bag with a corner cut off. Pipe a small dollop of frosting onto the center of each cookie. Optionally, you can decorate the frosting with mini red heart sprinkles!
10. Serve and Enjoy:
Now it’s time to enjoy your festive and delightful Red Velvet Blossom Cookies. They make a fantastic treat for gatherings or as a sweet surprise for yourself. Happy baking!
Can I Use a Different Type of Food Coloring?
Yes, you can use gel food coloring for a more vibrant red without adding too much liquid. Just a small amount will do! Liquid food coloring works too, but it may require a bit more to achieve the desired color.
How Should I Store Leftover Cookies?
Store any leftover cookies in an airtight container at room temperature for up to 5 days. If you want to keep them longer, you can freeze them in a freezer-safe container for up to 3 months. Just thaw at room temperature before enjoying!
Can I Make These Cookies Without White Chocolate Chips?
Absolutely! The white chocolate chips are optional, so feel free to omit them if you prefer. You can also substitute them with semi-sweet chocolate chips or nuts for added texture if desired.
How Can I Ensure My Cookies Stay Soft?
To keep your cookies soft, be careful not to overbake them; they should look slightly underbaked in the center before cooling. Cooling them completely on a wire rack helps maintain their softness, and ensuring they are stored in an airtight container also prevents them from drying out.