Peanut Butter Thumbprint Cookies are a match made in heaven! These chewy treats are filled with sweet jam in the center, giving them a delightful twist.
Every bite is like a warm hug! I love how easy they are to make, and the kids enjoy helping me create those little thumbprints. Perfect with a glass of milk!
Key Ingredients & Substitutions
Creamy Peanut Butter: This is the star of your cookies! For a nut-free version, you can substitute with sun butter or almond butter. Natural peanut butter works too, but it may change the texture slightly.
Granulated & Brown Sugar: The combination gives the cookies a balanced sweetness. If you want to lower the sugar, try using coconut sugar or a sugar substitute like stevia. Just keep in mind it might affect the texture!
Egg: The egg helps bind everything together. For a vegan option, use 1/4 cup of applesauce or a flax egg (1 tablespoon ground flaxseed mixed with 3 tablespoons water). It works great without sacrificing texture.
Flour: All-purpose flour works best here. If you’re gluten-free, you can substitute with a 1:1 gluten-free flour blend. Just ensure it contains some binding agents like xanthan gum.
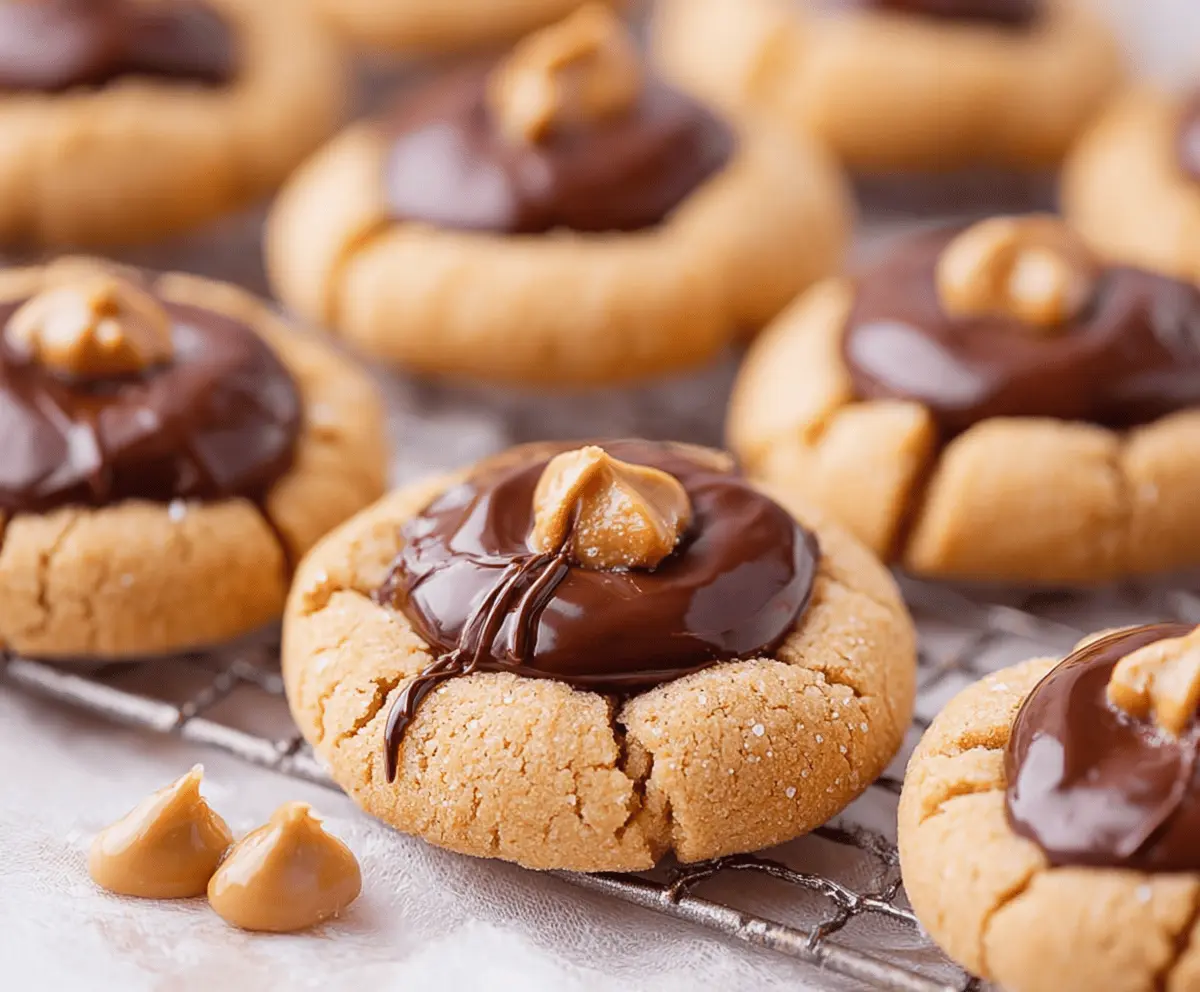
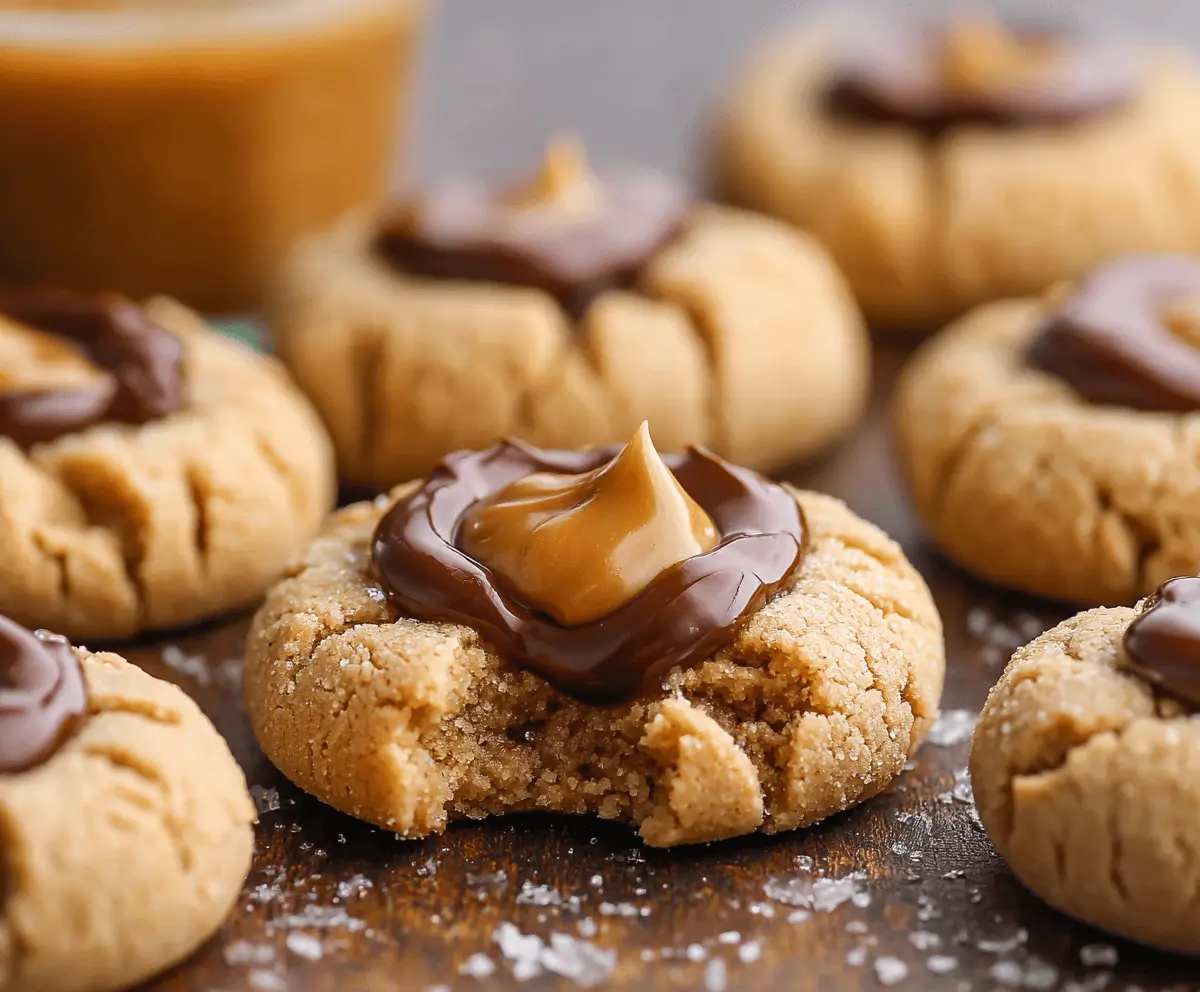
How Do You Achieve a Great Chocolate Ganache?
Making a smooth chocolate ganache is the key to filling those thumbprints. Here’s how you do it perfectly:
- Use high-quality chocolate chips; they melt better and taste great.
- Microwave in short bursts (20 seconds), stirring each time. This prevents burning.
- Adding butter or cream gives the ganache a rich texture. You can adjust the amount for a thicker or thinner consistency, based on your preference.
Remember, patience is key while melting! Once it’s mixed smoothly, it’s ready to fill those cookie indents beautifully. Enjoy the process!
Peanut Butter Thumbprint Cookie
Ingredients You’ll Need:
- 1 cup creamy peanut butter
- 1/2 cup granulated sugar
- 1/2 cup packed brown sugar
- 1 large egg
- 1 teaspoon vanilla extract
- 1 1/4 cups all-purpose flour
- 1/2 teaspoon baking soda
- 1/4 teaspoon salt
- 1 cup semi-sweet chocolate chips
- 1 tablespoon butter or cream (for chocolate ganache)
- 1/4 cup peanut butter (for dollop topping)
How Much Time Will You Need?
This delightful cookie recipe takes about 15 minutes for preparation and around 10-12 minutes for baking. Allow additional time for the cookies to cool. In total, you’re looking at about 30-40 minutes before you can enjoy these delicious treats!
Step-by-Step Instructions:
1. Prepare Your Oven and Baking Sheet:
Start by preheating your oven to 350°F (175°C). While it’s warming up, grab a baking sheet and line it with parchment paper to prevent sticking.
2. Mix Wet Ingredients:
In a large bowl, place the creamy peanut butter, granulated sugar, and brown sugar. Use a wooden spoon or spatula to mix them together until everything is well combined. This creates a smooth base for your cookies.
3. Add Egg and Vanilla:
Next, crack the egg into the bowl and add the vanilla extract. Beat the mixture until it’s smooth and creamy. This adds sweetness and a lovely flavor to your cookies.
4. Combine Dry Ingredients:
In another bowl, whisk together the all-purpose flour, baking soda, and salt. Once mixed, gradually fold the dry ingredients into the peanut butter mixture until fully combined. You’ll have a thick cookie dough!
5. Shape the Cookies:
Roll the dough into 1-inch balls, placing them on the prepared baking sheet. Ensure they are about 2 inches apart because they will spread while baking.
6. Create the Thumbprint:
Using your thumb or the back of a spoon, press a shallow indentation into the center of each dough ball. This is where the chocolate and peanut butter filling will go!
7. Bake the Cookies:
Put the baking sheet in the preheated oven and bake for 10-12 minutes, just until the edges are set and golden. Remove them from the oven and let them cool slightly.
8. Make the Chocolate Ganache:
While the cookies are cooling, melt the semi-sweet chocolate chips and butter or cream in a microwave-safe bowl. Do this in 20-second intervals, stirring in between until smooth and glossy.
9. Fill the Thumbprints:
Once the cookies have cooled a bit, carefully spoon or pipe the warm chocolate ganache into the thumbprint wells of each cookie.
10. Add the Peanut Butter Dollop:
While the chocolate is still warm, add a small dollop (about 1/4 teaspoon) of peanut butter into the center of the ganache on each cookie. It will melt slightly and create a lovely topping!
11. Cool and Serve:
Let the cookies cool completely on a wire rack, allowing the chocolate and peanut butter to firm up. Once cooled, they are ready to serve!
12. Enjoy!
Now it’s time to dig in! These cookies are soft, chewy, and full of flavor with that rich peanut butter base and silky chocolate center. Enjoy your delicious creation!
Can I Use Natural Peanut Butter Instead of Regular Peanut Butter?
Yes, you can! Just be aware that natural peanut butter tends to be runnier, which may slightly alter the texture of the cookies. If using natural peanut butter, consider chilling the dough for about 30 minutes before baking to help with the consistency.
What Type of Jam Can I Use for the Thumbprint?
Feel free to get creative with the jam! Classic choices like raspberry or strawberry work great, but you can also try apricot, blackberry, or even chocolate spread for a unique twist!
How Do I Store Leftover Cookies?
Store leftover cookies in an airtight container at room temperature for up to a week. If you want them to stay fresh longer, you can refrigerate them for up to two weeks, just note that they may lose some of their softness.
Can I Freeze These Cookies?
Absolutely! You can freeze the baked cookies for up to three months. Make sure they’re completely cooled, then place them in a single layer in an airtight container or freezer bag. When you’re ready to enjoy, thaw them at room temperature or pop them in the microwave for a few seconds!