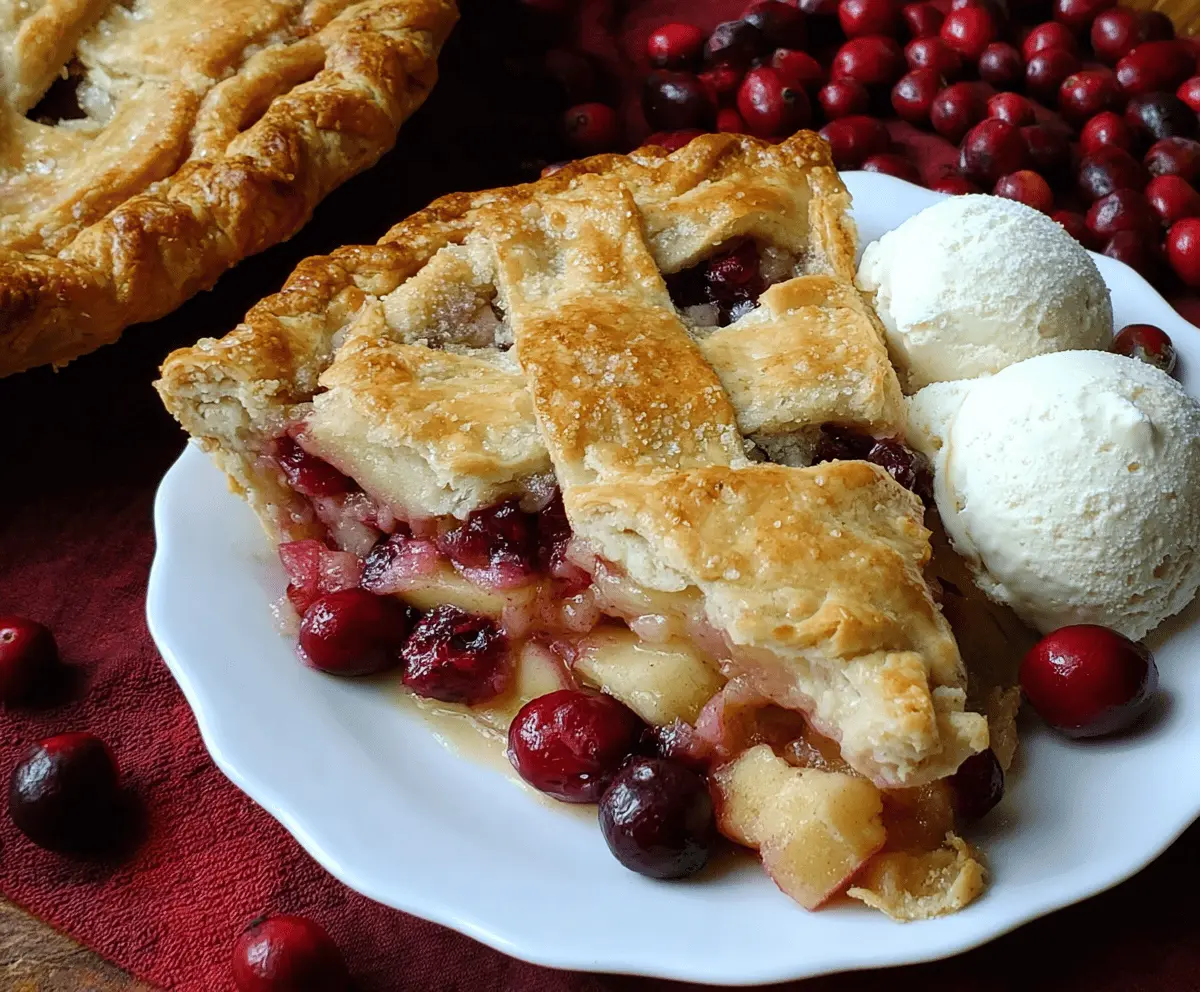
This delightful cranberry apple pie combines sweet apples and tart cranberries for a perfect bite. The flaky crust adds a lovely crunch that you’ll love!
Honestly, who can resist that sweet and tart combo? I usually sneak an extra slice, especially when it’s warm with a scoop of ice cream. It’s a comforting treat for everyone!
Key Ingredients & Substitutions
Apples: I recommend Granny Smith for their tartness, which balances well with the sweetness of the cranberries. Honeycrisp apples are also a great choice for extra sweetness and crunch. If you can’t find these, any tart apple like Braeburn or Jonagold will work.
Cranberries: Fresh cranberries give the best flavor, but frozen cranberries can be used in a pinch. Just make sure to thaw and drain excess moisture! If you’re looking for a substitute, you could use cherries or raspberries, but it will change the overall flavor profile.
Sweeteners: The combo of granulated and brown sugar adds depth. If you’re looking to cut down on sugar, consider using maple syrup or honey. Just adjust the amounts since they are sweeter than granulated sugar.
Pie Crust: A homemade crust is a lovely touch, but store-bought works perfectly fine for a quick dessert. If you’re gluten-free, many brands offer gluten-free pie crust options.
How Do I Make a Lattice Top for My Pie?
Creating a lattice top is easier than it sounds! Here’s a simple guide:
- Roll out the second pie crust and cut it into strips (about 1-inch wide).
- Lay half of the strips horizontally across the filling in the pie.
- Fold back every other strip, then lay a new strip vertically across the pie.
- Unfold the previously folded strips over the new strip.
- Repeat until the pie is fully covered, and don’t worry – the charm is in the rustic look!
Sealing the edges can be done by crimping with your fingers or pressing with a fork; it gives that homemade feel. Don’t forget to brush the lattice with egg wash for a lovely golden brown finish!

Mom’s Cranberry Apple Pie
Ingredients You’ll Need:
For The Pie:
- 2 pie crusts (store-bought or homemade)
- 5 cups peeled, cored, and sliced apples (e.g., Granny Smith or Honeycrisp)
- 2 cups fresh or frozen cranberries
- 3/4 cup granulated sugar
- 1/4 cup brown sugar, packed
- 1/4 cup all-purpose flour
- 1 tsp ground cinnamon
- 1/4 tsp ground nutmeg
- 1/4 tsp salt
- 1 tbsp lemon juice
- 2 tbsp unsalted butter, cut into small pieces
- 1 egg, beaten (for egg wash)
- Coarse sugar (optional, for sprinkling on crust)
- Vanilla ice cream (optional, for serving)
How Much Time Will You Need?
This delicious pie takes about 20 minutes to prepare and 1 hour to bake, plus at least 2 hours to cool. So, plan on about 3 hours total from start to finish before serving!
Step-by-Step Instructions:
1. Preheat the Oven:
Start by preheating your oven to 425°F (220°C). This will get it nice and hot for baking your pie!
2. Prepare the Fruit Filling:
In a large mixing bowl, combine your sliced apples with cranberries. Then, sprinkle in the granulated sugar, brown sugar, flour, cinnamon, nutmeg, salt, and lemon juice. Toss everything gently to make sure the fruit is well coated with the sugars and spices.
3. Line the Pie Plate:
On a lightly floured surface, roll out one of your pie crusts and place it into a 9-inch pie plate. Press it gently to fit into the plate, making sure to cover the bottom and sides.
4. Fill the Crust:
Pour the fruit mixture into the crust, spreading it out evenly. To finish off the filling, dot it with small pieces of butter so it melts into the fruit while baking.
5. Add the Top Crust:
For the top crust, roll out the second pie crust. You can cut it into strips to make a lovely lattice top, or simply lay it whole on top of the filling. If using a full crust, be sure to cut a few slits to let the steam escape. Seal the edges between the top and bottom crust with your fingers or a fork.
6. Egg Wash and Sugar:
Brush the top of your crust with the beaten egg and sprinkle a little coarse sugar over it, which will give it a beautiful finish once baked.
7. Bake the Pie:
Bake the pie at the high temperature of 425°F (220°C) for the first 15 minutes. Then, reduce the temperature to 350°F (175°C) and continue baking for about 40-50 minutes. You’re looking for a golden crust and bubbly filling!
8. Cool and Serve:
If your crust is browning too quickly, you can cover the edges with foil or a pie shield halfway through baking. Once baked, remove the pie from the oven and let it cool on a wire rack for at least 2 hours. This helps the filling set.
9. Enjoy:
Serve your warm pie or let it cool to room temperature. It’s divine on its own, but adding a scoop of vanilla ice cream just takes it to the next level!
Enjoy every bite of this scrumptious Mom’s Cranberry Apple Pie, with its perfect blend of sweet apples and tart cranberries!
Can I Use Different Types of Apples?
Absolutely! While Granny Smith and Honeycrisp are great choices, you can use any firm apples that are good for baking, like Braeburn or Jonagold. The key is to balance sweet and tart flavors.
How Can I Thicken the Filling?
If you find that your filling seems too liquidy, you can add an extra tablespoon of flour or cornstarch to help thicken it. Just sprinkle it over the fruit mixture and toss gently before pouring it into the crust.
How Do I Store Leftovers?
Leftover pie can be stored in the fridge, covered with plastic wrap or in an airtight container, for up to 3 days. To reheat, simply slice a piece and warm it in the microwave or oven until heated through.
Can I Freeze Cranberry Apple Pie?
Yes! This pie freezes well. Just wrap it tightly in plastic wrap and then in aluminum foil or an airtight container. You can freeze it for up to 3 months. To bake from frozen, add about 20-30 minutes to the baking time, baking at 350°F (175°C) until heated through.