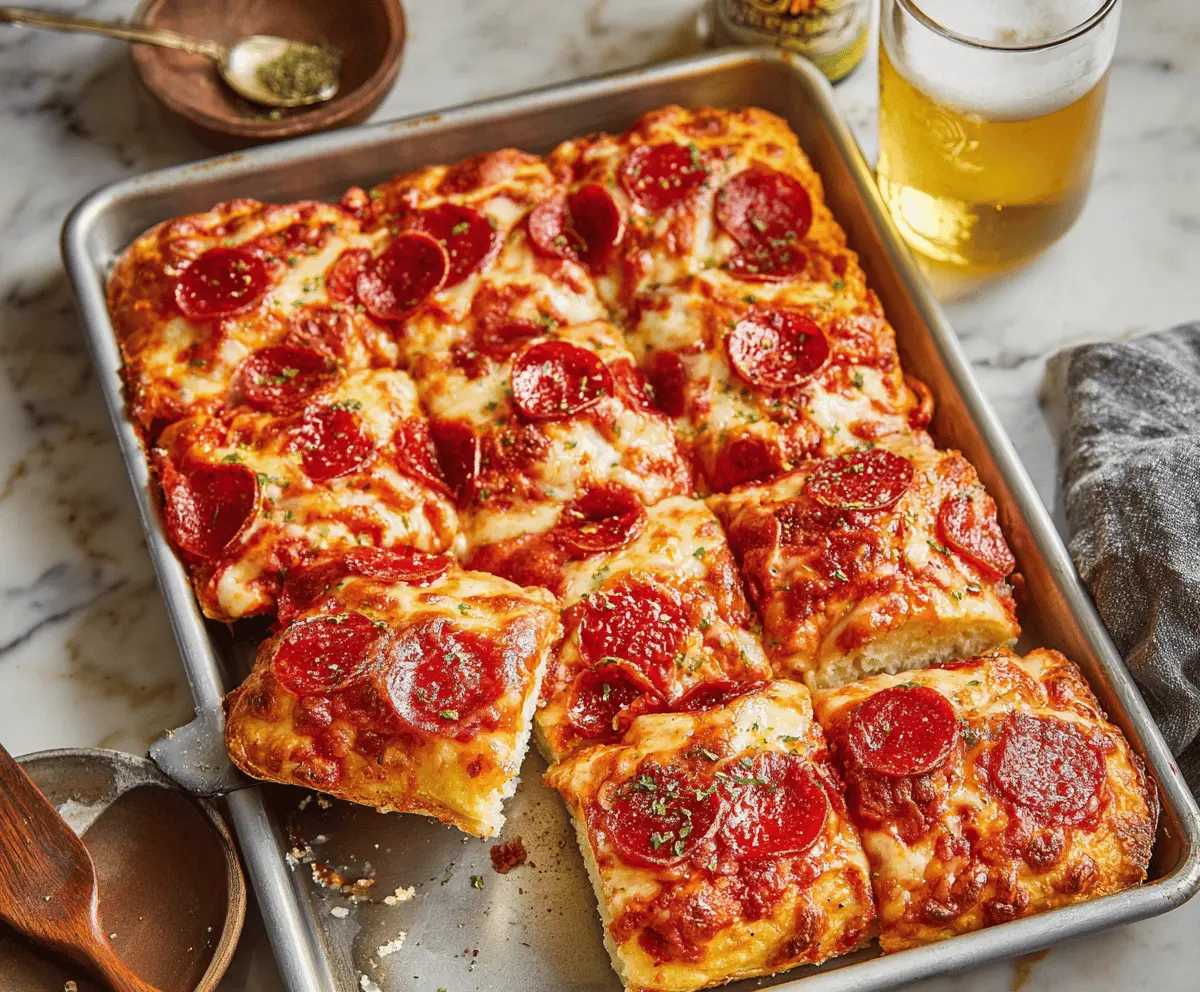
Nothing beats the comforting aroma of a homemade pizza fresh out of the oven. This Homemade Sheet Pan Pizza Recipe is the perfect weeknight dinner or weekend treat for pizza lovers of all ages. With its golden, crispy edges, melty cheese, and your favorite toppings, it brings the pizzeria experience right into your own kitchen.
Whether you’re feeding a family, entertaining friends, or simply craving a satisfying slice, this sheet pan pizza is both easy to make and customizable. The beauty of a sheet pan pizza is that it spreads the dough thin for a quick bake, giving you that delightful balance of a soft center and a slightly crisp crust. It’s a fun, hands-on meal that allows everyone to top their slice just the way they like it.
This recipe is designed for simplicity without sacrificing flavor. From choosing the right dough and sauce to layering toppings evenly, you’ll discover tips to make every bite delicious. Perfect for busy weeknights, casual gatherings, or even meal prepping, this sheet pan pizza recipe is a go-to that you’ll make again and again.
Key Ingredients & Substitutions
Choosing high-quality ingredients makes a world of difference in your pizza. Here are the essentials and possible swaps to suit your taste or dietary needs.
Pizza Dough: A soft, pliable dough is key for a sheet pan pizza. You can use store-bought dough for convenience, or make your own for a fresher taste. Gluten-free dough is also a great alternative for those with dietary restrictions.
Tomato Sauce: Use a classic marinara or pizza sauce for a rich, tangy base. For a lighter option, try a roasted garlic or tomato-basil puree. You can also experiment with pesto or white sauce for a different flavor profile.
Mozzarella Cheese: Fresh mozzarella melts beautifully and gives a creamy texture. You can mix it with provolone or cheddar for added flavor. Vegan cheese options work well for dairy-free versions.
Toppings: Choose vegetables, meats, or plant-based proteins according to your preference. Bell peppers, mushrooms, onions, and olives are classic veggie options, while pepperoni, sausage, or cooked chicken add savory notes.
Olive Oil: Brushing the dough with olive oil before baking enhances the crust’s crispness and adds a subtle flavor. For a lighter alternative, use a neutral oil or cooking spray.
Herbs & Seasonings: Fresh basil, oregano, and red pepper flakes elevate the pizza’s flavor. Dried herbs or Italian seasoning blends work perfectly if fresh isn’t available.
Equipment You’ll Need
- 1 large sheet pan
- Mixing bowls
- Rolling pin or hands for shaping dough
- Sharp knife or pizza cutter
- Measuring cups and spoons
- Oven mitts
- Spatula or tongs for serving
Flavor Variations & Add-Ins
- Margherita style with fresh tomatoes, basil, and a drizzle of olive oil
- BBQ chicken with red onion, cilantro, and a tangy barbecue sauce base
- Pepperoni and sausage combo for classic meat lovers
- Vegetarian delight with zucchini, mushrooms, spinach, and artichokes
- White pizza with ricotta, garlic, and spinach
- Spicy pizza with jalapeños, red pepper flakes, and hot sausage
- Breakfast pizza topped with scrambled eggs, bacon, and cheddar
- Mediterranean style with feta, olives, sun-dried tomatoes, and spinach
How to Make Homemade Sheet Pan Pizza Recipe
Ingredients You’ll Need:
- 1 pound pizza dough
- 1/2 cup tomato sauce
- 2 cups shredded mozzarella cheese
- Your choice of toppings (vegetables, meats, or plant-based alternatives)
- 1–2 tablespoons olive oil
- Fresh herbs (basil or oregano) or dried Italian seasoning
- Salt and pepper, to taste
How Much Time Will You Need?
Total time is approximately 45–60 minutes, including preparation and baking. The dough rests for 10–15 minutes before shaping, and the pizza bakes for 20–25 minutes until the cheese is bubbly and the edges are golden brown.
Step-by-Step Instructions:
1. Prepare the Dough
Preheat your oven to 425°F (220°C). Lightly grease your sheet pan with olive oil. Roll or stretch the dough to fit the size of your pan. Press the dough evenly to create a thin, uniform layer.
2. Add the Sauce
Spread the tomato sauce evenly over the dough, leaving a small border around the edges for the crust. Use the back of a spoon to smooth the sauce and ensure it covers the entire surface.
3. Layer the Cheese and Toppings
Sprinkle shredded mozzarella evenly over the sauce. Add your chosen toppings in a single layer to ensure even cooking. Be careful not to overload the pizza to avoid soggy areas.
4. Bake the Pizza
Place the sheet pan in the preheated oven and bake for 20–25 minutes. Check for golden, bubbly cheese and crisp edges. If needed, broil for an additional 1–2 minutes for extra browning.
5. Garnish and Serve
Remove the pizza from the oven and let it cool for 3–5 minutes. Sprinkle fresh herbs, drizzle a bit of olive oil, and cut into squares or rectangles for serving. Enjoy warm!
Pro Tips for Best Texture & Taste
Achieving the perfect sheet pan pizza is all about layering flavors and ensuring the dough cooks evenly. Here are some tips to make your pizza stand out:
- Preheat the oven fully to ensure a crisp crust.
- Use a light hand with toppings to avoid soggy pizza.
- Brush the edges of the dough with olive oil for a golden, flavorful crust.
- Allow the pizza to rest briefly after baking for the cheese to set slightly.
- Experiment with different cheeses or herb combinations to find your signature flavor.
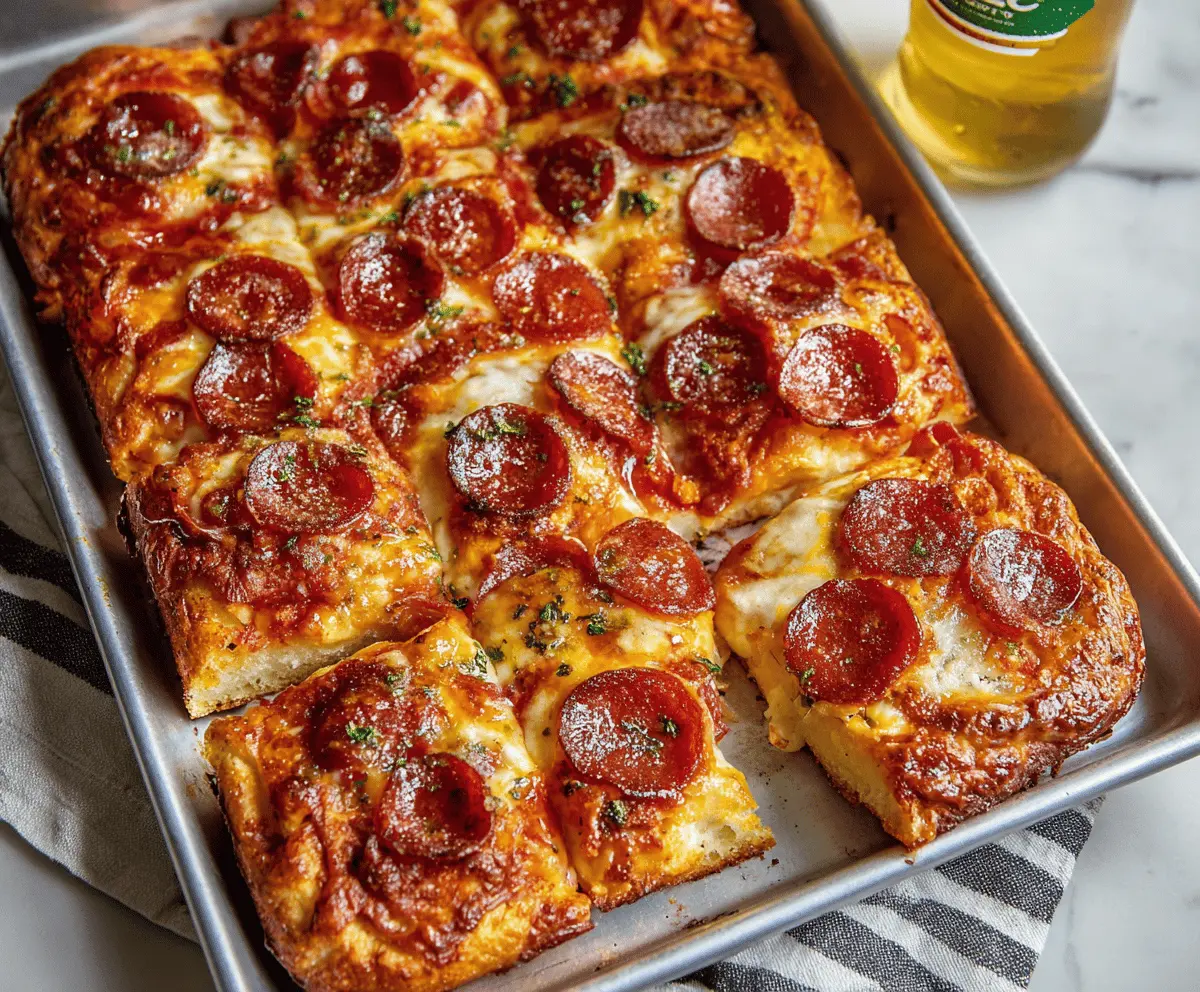
Homemade Sheet Pan Pepperoni Pizza
Frequently Asked Questions
Can I make this pizza vegan or gluten-free?
Yes! Use gluten-free pizza dough and dairy-free cheese alternatives. Load up with vegetables and plant-based proteins for a fully vegan version.
Can I prepare the pizza ahead of time?
Absolutely. Assemble the pizza on the sheet pan, cover tightly with plastic wrap, and refrigerate for up to 24 hours. Bake as directed, adding a few extra minutes if chilled.
How should I store leftovers?
Store leftover pizza in an airtight container in the refrigerator for 3–4 days. Reheat in the oven or on a skillet to retain crispness.
Can I freeze this sheet pan pizza?
Yes, you can freeze the assembled but unbaked pizza. Wrap tightly in plastic wrap and foil, then freeze for up to 2 months. Bake directly from frozen, adding 5–10 minutes to the cooking time.
Homemade Sheet Pan Pizza
A fun, crowd-friendly pizza you bake on a sheet pan — made with homemade dough, classic marinara sauce, melty cheese, and your favorite toppings.
Ingredients
- 2 ¼ tsp active dry yeast
- 1½ cups warm water (about 110°F / 45°C) :contentReference[oaicite:0]{index=0}
- 3½ cups all-purpose flour plus extra for dusting :contentReference[oaicite:1]{index=1}
- 2 tbsp olive oil, plus more for greasing the pan :contentReference[oaicite:2]{index=2}
- 1 tsp salt :contentReference[oaicite:3]{index=3}
- 1 tsp sugar :contentReference[oaicite:4]{index=4}
- 1½ cups marinara or pizza sauce :contentReference[oaicite:5]{index=5}
- 3 cups shredded mozzarella cheese :contentReference[oaicite:6]{index=6}
- 30–40 slices of pepperoni (or your choice of toppings) :contentReference[oaicite:7]{index=7}
- 1 tsp dried oregano or Italian seasoning :contentReference[oaicite:8]{index=8}
- Grated Parmesan, for sprinkling :contentReference[oaicite:9]{index=9}
- Fresh parsley or basil, chopped (optional) :contentReference[oaicite:10]{index=10}
Cozy Little Things I’m Loving
These are small tools I actually reach for in my own kitchen all the time.

Mueller Power Chopper — the No-Stress Veggie Prep Tool
Perfect for chopping herbs or garlic cleanly and fast when prepping your pizza toppings.
View on Amazon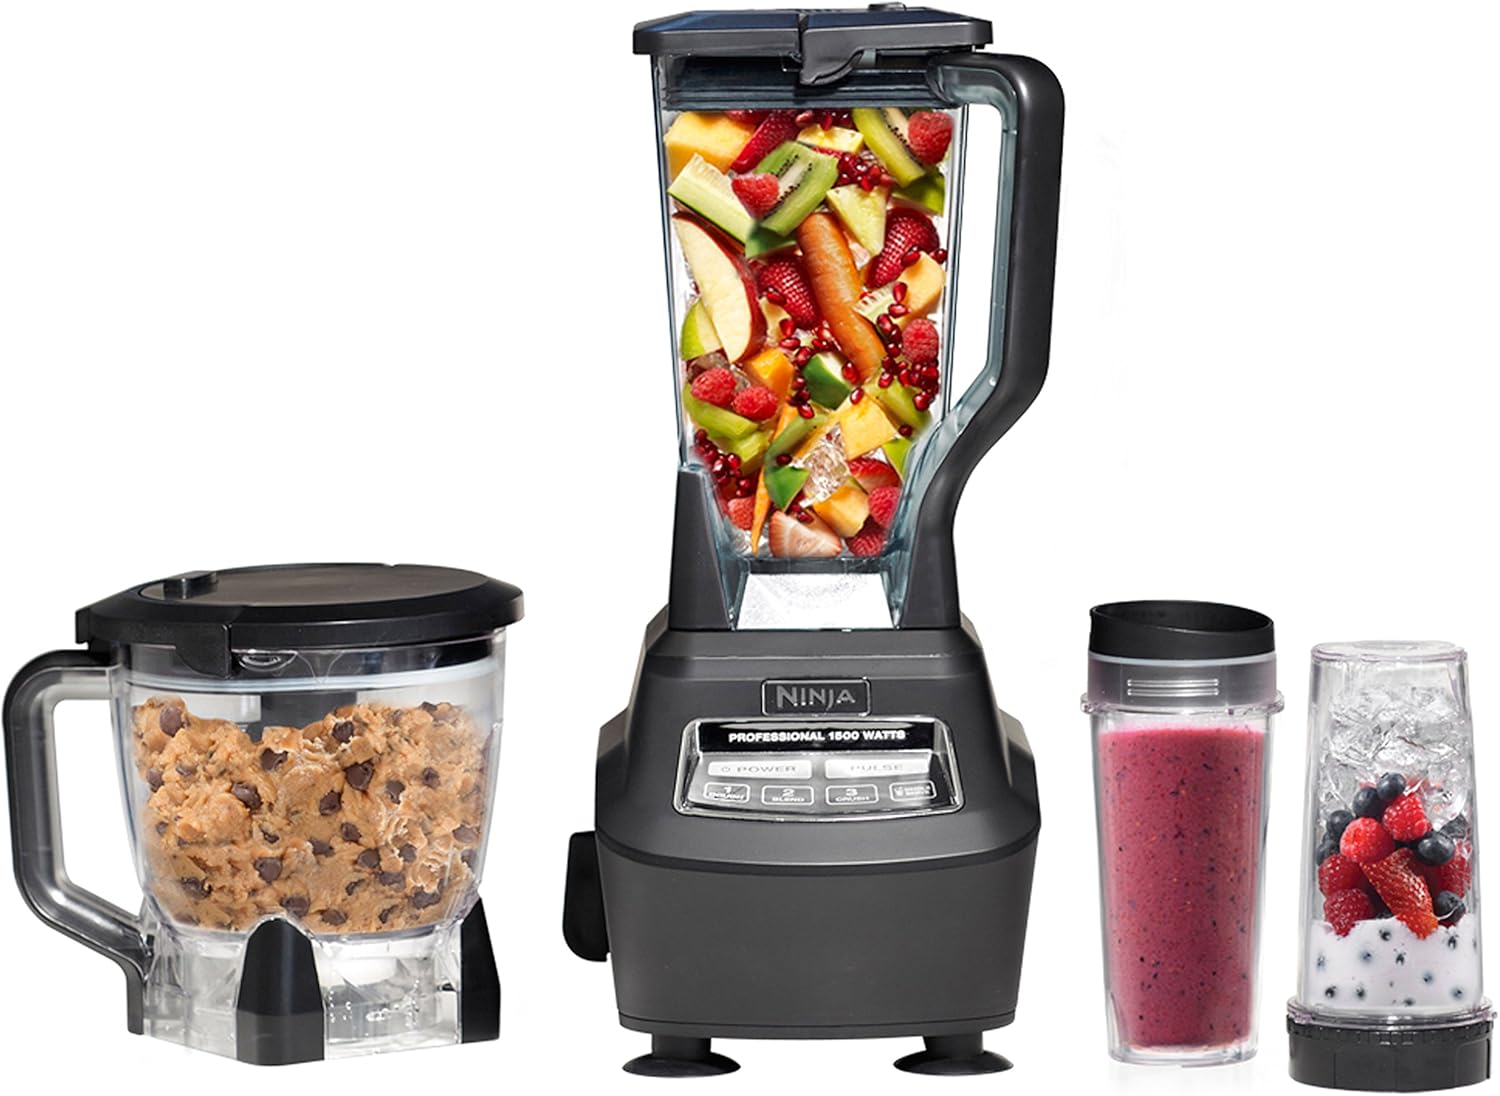
Ninja 1500 W Blender + Food Processor System
This multitasker helps me mix dough or whip up a quick homemade sauce — total kitchen workhorse.
View on AmazonThis section contains affiliate links. If you purchase through them, I may earn a small commission at no extra cost to you. Thank you for supporting the blog. 💛
Instructions
- In a small bowl, combine the warm water and sugar. Sprinkle the active dry yeast on top and let sit for 5–10 minutes until it becomes foamy. :contentReference[oaicite:11]{index=11}
- In a large mixing bowl, whisk together the flour and salt. Then add the yeast mixture and 2 tablespoons of olive oil. Stir until it forms a rough dough. :contentReference[oaicite:12]{index=12}
- Turn the dough onto a lightly floured surface and knead for about 7–10 minutes, until it becomes smooth and elastic. :contentReference[oaicite:13]{index=13}
- Grease a clean bowl with olive oil, place the dough inside, and cover with a towel or plastic wrap. Let it rise in a warm spot for about 1 to 1½ hours, or until it doubles in size. :contentReference[oaicite:14]{index=14}
- Preheat your oven to 450°F (230°C). Meanwhile, grease a large sheet pan with a little olive oil. :contentReference[oaicite:15]{index=15}
- Punch down the dough to release trapped air. Transfer it to the greased sheet pan, and gently stretch or roll it until it fills the pan and reaches the edges. :contentReference[oaicite:16]{index=16}
- Spread the pizza sauce evenly over the dough, then sprinkle the shredded mozzarella. Arrange the pepperoni (or your chosen toppings) on top. :contentReference[oaicite:17]{index=17}
- Bake the pizza in the preheated oven for 15–20 minutes, or until the crust is golden and the cheese is bubbling and slightly browned. :contentReference[oaicite:18]{index=18}
- Remove from oven and sprinkle with Italian seasoning or dried oregano, grated Parmesan, and, if using, fresh parsley or basil. Let it rest a few minutes, then cut into squares and serve. :contentReference[oaicite:19]{index=19}