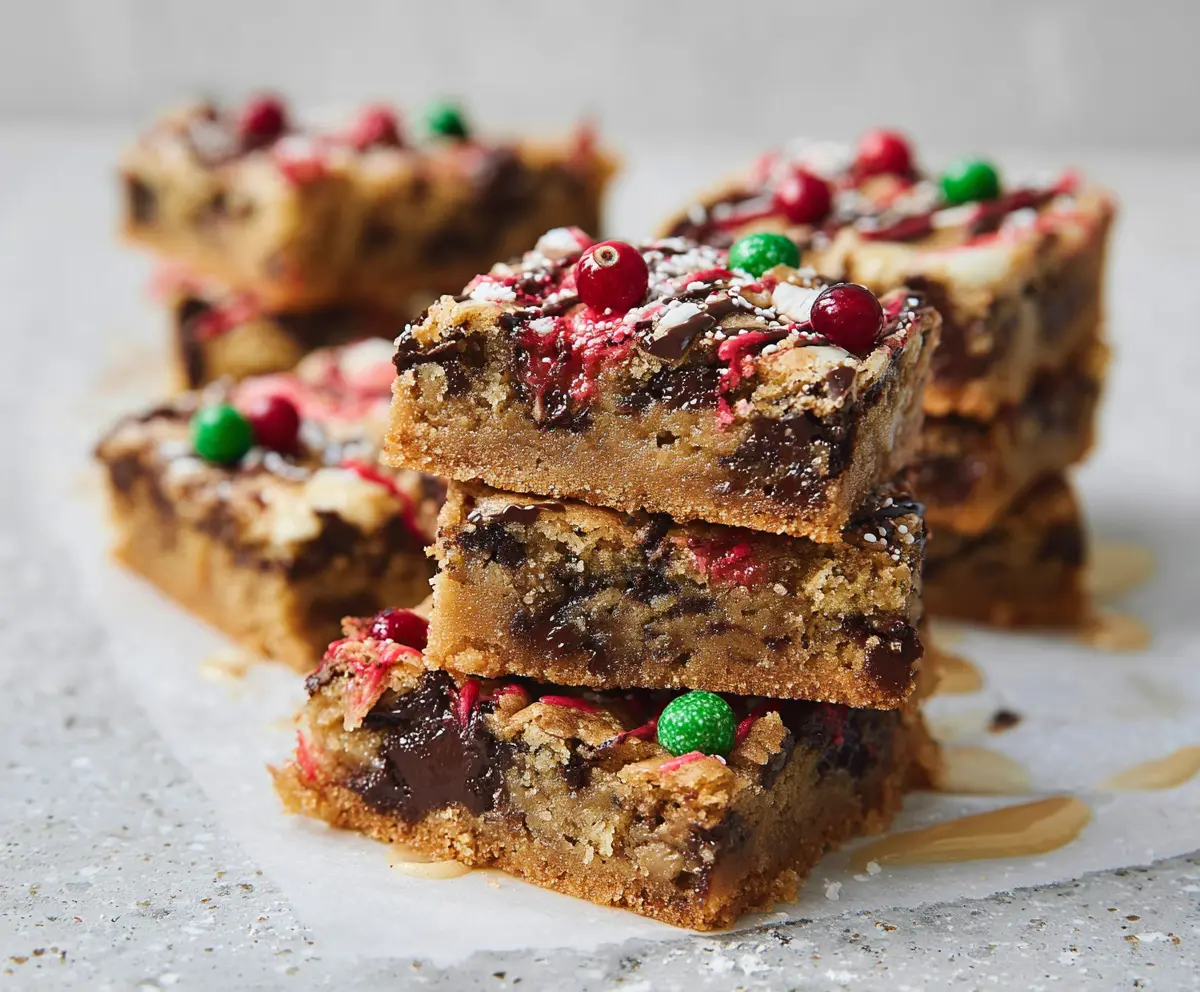
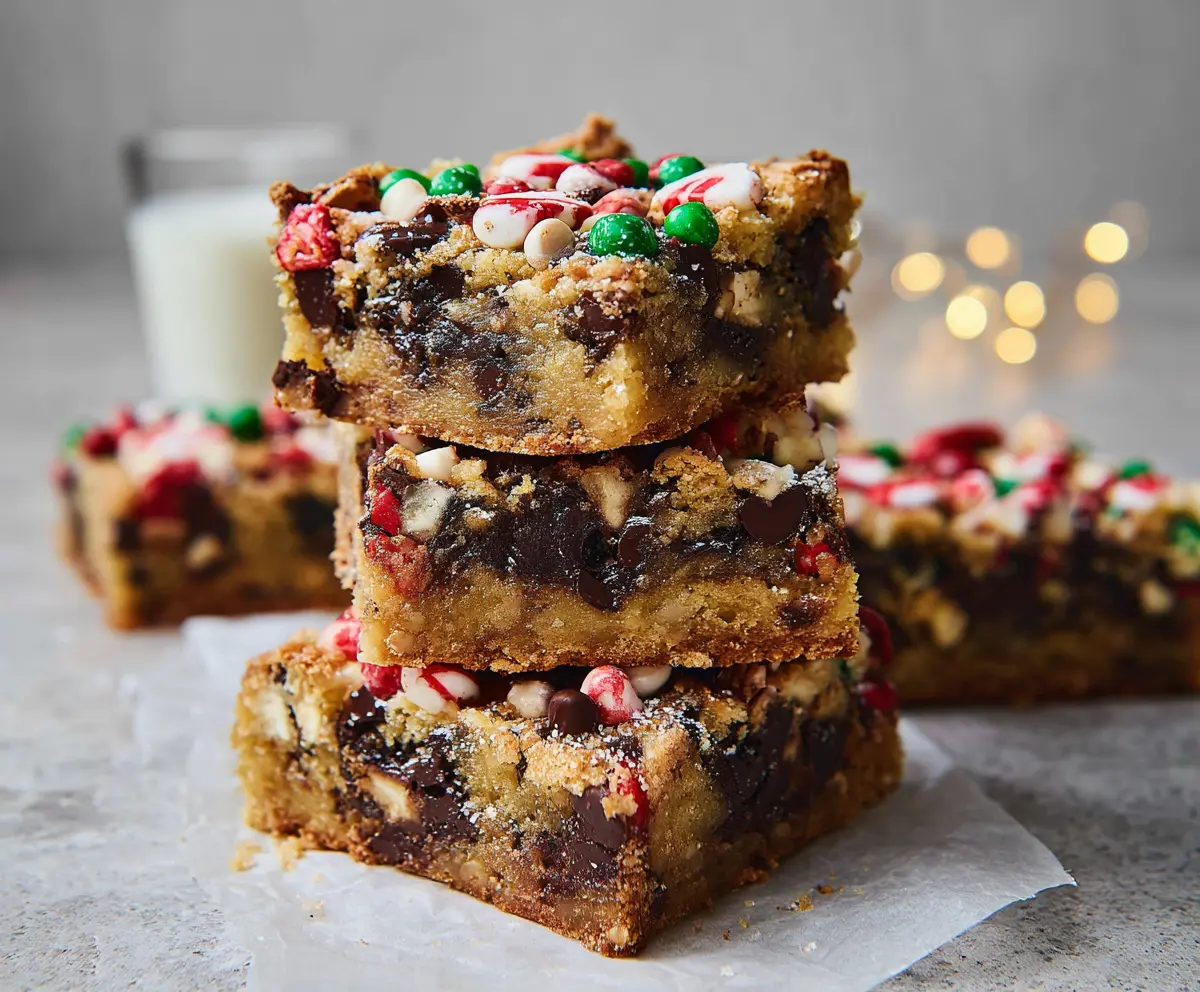
These warm and chewy Christmas blondies are packed with sweet white chocolate and festive flavors. They’re perfect for sharing with family and friends during the holiday season!
When I bake these, my kitchen smells like a holiday wonderland! I like to add a sprinkle of red and green sprinkles on top for a fun touch. It’s an easy treat that everyone loves! 🎄
Key Ingredients & Substitutions
Unsalted Butter: This adds richness and moisture. If you’re out of butter, you can substitute with an equal amount of coconut oil or vegetable oil. Just keep in mind this might change the flavor slightly.
Light Brown Sugar: This sugar gives a nice depth of flavor. If you prefer, you can use granulated sugar or dark brown sugar for a richer molasses taste.
Eggs: Eggs help bind the ingredients and add moisture. For a vegan option, you can substitute each egg with 1/4 cup unsweetened applesauce or a flax egg (1 tablespoon ground flaxseed mixed with 3 tablespoons water).
Chocolate Chips: Use semisweet or mix in milk chocolate for a sweeter taste. Dark chocolate chips work too if you like a more intense chocolate flavor. You could also swap them for white chocolate or butterscotch chips.
Sprinkles: These add a festive touch! Feel free to switch them up for other colors or candies like M&Ms or chopped cranberries for a fruity twist.
How Do You Get the Right Blondie Texture?
Getting that perfect chewy blondie texture is key! Follow these steps for the best results:
- Mix butter and sugar fully until smooth; this helps aerate the mixture.
- Add eggs one at a time and mix well each time to keep the structure light.
- When combining wet and dry ingredients, be careful not to overmix. Just combine until you see no more flour.
- Let the blondies cool in the pan before cutting to help them set. This really makes a difference!
Christmas Blondies
Ingredients You’ll Need:
- 1 cup (225g) unsalted butter, melted
- 1 1/2 cups (300g) light brown sugar, packed
- 2 large eggs
- 2 tsp vanilla extract
- 2 cups (250g) all-purpose flour
- 1 tsp baking powder
- 1/2 tsp salt
- 1 1/2 cups (270g) chocolate chips (semisweet or a mix of semisweet and milk chocolate)
- Red and green colored sprinkles or small round holiday candies
- Optional: 1/4 cup white chocolate chips or chopped nuts for extra texture and festivity
How Much Time Will You Need?
This recipe will take about 15 minutes to prepare and 25-30 minutes to bake. Don’t forget about the cooling time; letting the blondies sit in the pan until fully cooled (about 30 minutes) will help them set perfectly. So, altogether, you’re looking at around 1 hour total before you can dig in!
Step-by-Step Instructions:
1. Prepping the Oven and Pan:
First, let’s get our oven nice and warm! Preheat it to 350°F (175°C). Prepare a 9×13-inch baking pan by lining it with parchment paper, which will make it easier to lift the blondies out later, or you can just lightly grease the pan. Either way works!
2. Mixing the Butter and Sugar:
In a big bowl, combine the melted butter and brown sugar. Stir it well until it’s nice and smooth—this helps your blondies be delicious and chewy.
3. Adding Eggs and Vanilla:
Next, add your eggs one at a time, mixing well after each addition. This is super important! Then pour in the vanilla extract and give it a good stir to make everything come together.
4. Combining Dry Ingredients:
In another bowl, whisk together the flour, baking powder, and salt. This will ensure your blondies rise nicely and have a good texture.
5. Mixing It All Together:
Now, slowly add the dry ingredients into the bowl with the wet ingredients. Stir gently until everything is just combined. Be careful not to overmix—you want chewy blondies, not tough ones!
6. Adding Chocolate Chips:
Gently fold in those yummy chocolate chips, and if you like, add the optional white chocolate chips or chopped nuts for an added crunch!
7. Spreading in the Pan:
Spread the batter evenly into your prepared baking pan. Don’t worry about it being perfect; it will spread out while it bakes.
8. Adding Festive Touches:
Now for the fun part! Sprinkle the top generously with red and green sprinkles or your favorite holiday candies to make it festive and bright!
9. Baking Time:
Pop the pan into the preheated oven and bake for 25-30 minutes. Keep an eye on it—when the top is golden and a toothpick inserted in the center comes out with a few moist crumbs, it’s ready to go!
10. Cooling and Slicing:
Let the blondies cool completely in the pan. This is crucial to getting neat slices! Once they’re cool, lift them out using the edges of the parchment paper and slice into squares.
11. Enjoying Your Treat!
Serve these festive treats to your family and friends, and watch them disappear! Enjoy the rich, chewy goodness of your Christmas blondies!
Happy holidays and happy baking! 🎄
Can I Use Different Types of Chocolate Chips?
Absolutely! You can mix and match chocolate chips to your liking. Consider using dark chocolate chips for a richer flavor, or try white chocolate chips for a sweeter option. Feel free to combine semisweet and milk chocolate chips for a delicious blend!
Can I Make This Recipe Gluten-Free?
Yes! To make these blondies gluten-free, simply substitute the all-purpose flour with a 1:1 gluten-free flour blend. Just ensure your baking powder is gluten-free as well. Enjoy your holiday treat without worry!
How Should I Store Leftover Blondies?
Store any leftover blondies in an airtight container at room temperature for up to 3 days. You can also refrigerate them for up to a week. Just let them come to room temperature before enjoying again or microwave them for a few seconds to warm!
Can I Freeze These Blondies?
Yes, you can! Once they are completely cooled, wrap the blondies tightly in plastic wrap and then place them in a freezer bag. They can be frozen for up to 3 months. Thaw them in the fridge overnight before enjoying, or let them sit at room temperature for a quick treat!