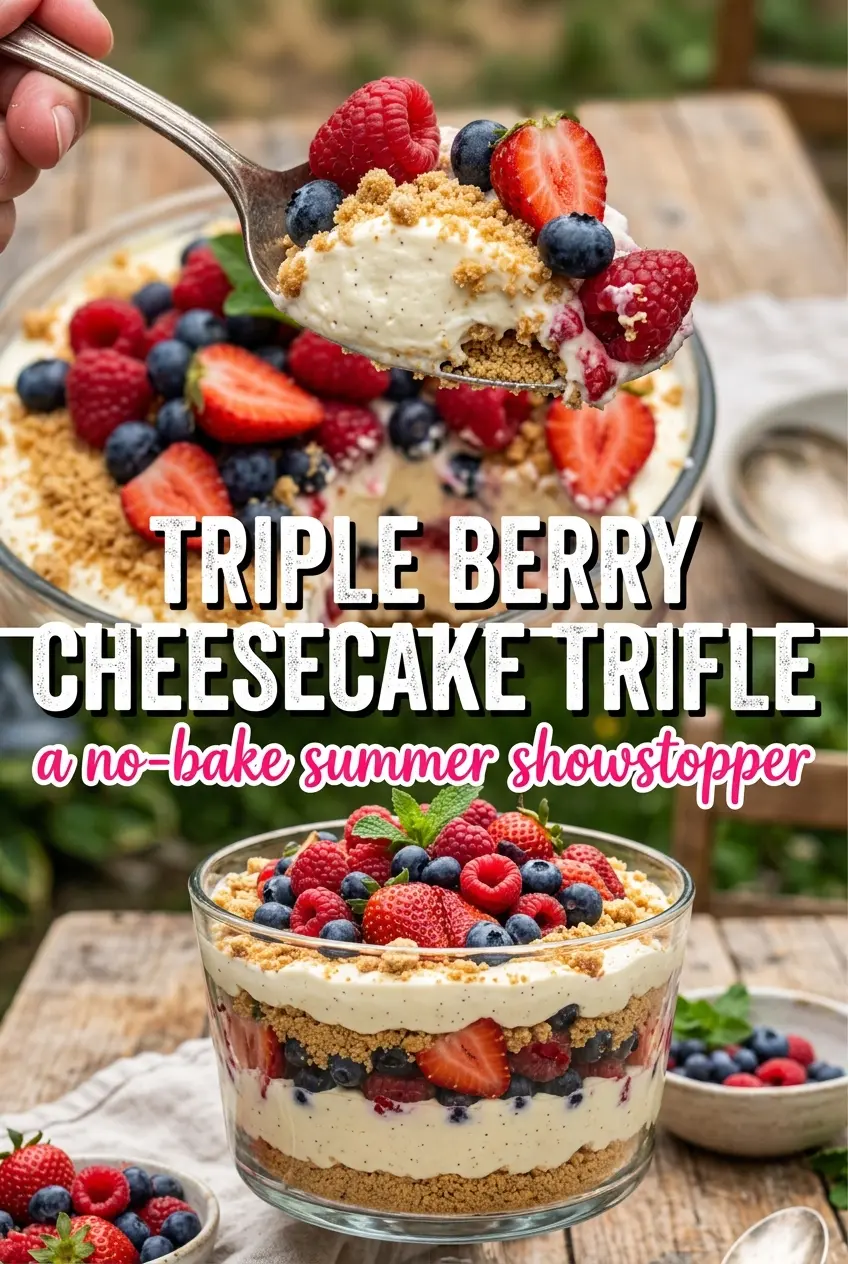
Layers of buttery graham crumbs, silky cheesecake filling, and three kinds of berries turn this trifle into the kind of dessert people hover over until the bowl is scraped clean. It looks generous and a little fancy, but the real appeal is how each spoonful gives you crunch, creaminess, and bright fruit all at once. No baking, no fussy decorating, just a dessert that lands exactly where it should: cold, rich, and full of fresh flavor.
What makes this version work is the balance. The cream cheese gets beaten smooth before the whipped cream goes in, which keeps the filling light instead of dense. The berry layers stay separate enough to look dramatic, but they also leak just enough juice into the cream and crumbs to make every bite taste unified. Graham crumbs need enough butter to hold their shape, but not so much that they turn greasy and heavy.
Below, I’ll walk through the part that matters most: how to keep the layers distinct without making the trifle soggy. I’ve also included a few smart swaps and the best way to serve it after chilling so the berries stay bright and the filling holds its shape.
The cheesecake layer turned out smooth and fluffy, and the graham crumbs stayed just crunchy enough even after chilling. I made it the night before a cookout and the berries on top still looked fresh the next day.
Save this Triple Berry Cheesecake Trifle for a no-bake dessert with creamy layers, juicy berries, and a graham crust that holds up after chilling.
The Layer Order That Keeps a Trifle from Going Mushy

The mistake most trifles make is putting the wettest layer in direct contact with the crumb layer for too long. Once that happens, the texture goes from pleasantly soft to collapsed and muddy. Here, the cheesecake filling acts like a barrier between the crumbs and the berries, so the dessert stays layered instead of turning into berry soup with cookie bits in it.
The other thing worth paying attention to is how much pressure you use when building the layers. You want the crumbs nestled, not packed down hard. A light hand keeps the base from turning into a dense crust, and it gives the cream filling room to settle into the gaps. Chilling helps the structure, but the real stability comes from those first layers being built with enough control.
- Graham cracker crumbs — Fine crumbs absorb the butter evenly and give you a soft, sandy base that still tastes buttery after chilling. Store-bought crumbs work well here; if you crush them yourself, pulse until they look uniform instead of leaving bigger pieces that feel dry.
- Unsalted butter — This is what turns the crumbs into a layer that holds together instead of scattering at the bottom of the dish. Melt it fully, then stir until every crumb looks coated. If the mixture looks greasy, you’ve added too much butter or your crumbs are too coarse.
- Cream cheese — Full-fat cream cheese gives the filling its body and tang. Let it soften first or you’ll end up with tiny lumps that never fully smooth out, even after whipping. Lower-fat versions can work, but the filling won’t have the same rich, stable texture.
- Heavy whipping cream — Whipped to soft peaks, it lightens the cream cheese mixture without making it runny. Don’t whip it to stiff, dry peaks before folding or the filling can turn grainy and lose that mousse-like finish.
- Fresh berries — Strawberries bring sweetness, blueberries add a little pop, and raspberries bring tartness that keeps the dessert from tasting flat. Use ripe berries for the best flavor, but pat them dry after washing so extra water doesn’t slip into the layers.
Building the Filling So It Stays Light Instead of Heavy
Mix the Base Until It’s Completely Smooth
Beat the cream cheese first with the powdered sugar and vanilla until it looks glossy and free of lumps. This is the point where any texture problem gets baked into the whole dessert, even though nothing is actually baked. If the cream cheese still looks stiff or speckled, keep beating before you add the whipped cream, because lumps don’t disappear once the filling is airy.
Fold in the Whipped Cream Gently
Add the whipped cream in two or three additions and fold with a spatula rather than stirring hard. You’re looking for a filling that holds soft shape on a spoon, not something dense enough to pipe. Overmixing knocks out the air and leaves you with a cheesecake layer that eats heavy instead of silky.
Layer with a Light Hand
Spoon in about a third of each component and spread it just enough to cover the layer beneath it. Don’t press the crumbs down as if you’re making a crust; that traps the filling instead of giving the dessert those soft, distinct layers. Finish with berries on top so the trifle looks fresh the moment it hits the table.
Make It Dairy-Free Without Losing the Creamy Layers
Use dairy-free cream cheese and a coconut-based whipped topping in place of the cream cheese and heavy cream. The texture will be a little softer and the flavor slightly coconut-forward, but the trifle still layers well and chills into a scoopable dessert.
How to Make It Gluten-Free
Swap in certified gluten-free graham-style crumbs or crushed gluten-free vanilla cookies. The structure stays the same, but the flavor may be a little sweeter and the crumbs can soften faster, so serve it after the shortest chill time that gives you enough set.
Turn It Into Individual Dessert Cups
Build the layers in small glasses or jars for cleaner serving and better portion control. The taste is the same, but the berries and cream stay more distinct, and the presentation feels polished without needing a big serving spoon.
Storage and Reheating
- Refrigerator: Store covered for up to 3 days. The crumbs soften as it sits, but the filling stays creamy and the berries stay bright if you keep it cold.
- Freezer: I don’t recommend freezing this one. The cream layer turns grainy after thawing and the berries lose their fresh texture.
- Reheating: No reheating needed. Serve it straight from the fridge, and if it’s been chilled overnight, let it sit out for 10 minutes so the filling loosens just enough to spoon cleanly.
Answers to the Questions Worth Asking
Triple Berry Cheesecake Trifle
Ingredients
Method
- Mix the graham cracker crumbs with the melted butter until it resembles wet sand. Look for crumbs that clump when pressed together.
- Beat the cream cheese, powdered sugar, and vanilla until smooth, then fold in the whipped cream. Stop mixing once the cream is fully incorporated and the filling looks thick and airy.
- In a trifle dish, layer a third of the graham crumbs, followed by a third of the cheesecake mixture, then a third of the mixed berries. Press the layers gently so they settle evenly.
- Repeat the layers two more times, finishing with a layer of berries on top. Keep the top berry layer flat for an even chill.
- Chill for at least 2 hours before serving to let the layers set. The trifle is ready when the filling holds its shape when you scoop.
- Store covered in the fridge for up to 3 days. Keep it chilled so the crumbs stay distinct between layers.