
This Pineapple Thai Pulled Pork is a sweet and tangy delight! Slow-cooked pork with juicy pineapple and fragrant Thai spices makes for a tasty main dish that’s perfect for tacos or sandwiches.
I love how the pineapple adds a fun twist to the classic pulled pork. It’s like a tropical vacation on your plate! 🌴 Plus, it’s super easy to make—just set it and forget it!
Key Ingredients & Substitutions
Pork Shoulder: This cut is ideal for pulled pork because it becomes tender during the long cooking process. If you can’t find it, a boneless pork butt or even chicken thighs can be good alternatives.
Pineapple: Fresh pineapple gives the best flavor and texture, but canned pineapple works in a pinch. Just make sure to drain it well if using canned. An interesting twist is using mango for a different fruity note!
Jasmine Rice: I love jasmine rice for its fragrant aroma, but you can use basmati rice as a substitute. If you’re after a whole grain option, try brown rice, though cooking times may differ.
Fish Sauce: For those avoiding fish, you can substitute with soy sauce or tamari for a similar umami taste. Just bear in mind the dish may lack that unique fish sauce depth.
Red Chili Peppers: If you want less heat, omit them or use bell peppers for a sweet crunch. Alternatively, add a pinch of red pepper flakes for a gentler spice.
How Do I Get the Perfectly Shredded Pork?
Shredding the pork may seem tricky, but with the right techniques, it’s super easy! The key is to cook the pork until it’s fork-tender. Here’s how:
- Ensure you sear the pork well; this builds flavor.
- After cooking, let the pork sit for a few minutes to cool slightly.
- Use two forks to pull the meat apart. Start with the grain of the meat to make it easier!
- Mix the shredded meat with the pineapple and juices from the pot to keep it moist and flavorful.
Practicing these steps will give you pull-apart tender pork that’s perfect for serving! Enjoy your cooking!
How to Make Pineapple Thai Pulled Pork
Ingredients You’ll Need:
Main Ingredients:
- 2 lbs pork shoulder (boneless)
- 1 cup pineapple chunks or slices (fresh or canned)
- 1 cup jasmine rice (uncooked)
- 2 tbsp vegetable oil
- 1 onion, finely chopped
- 3 garlic cloves, minced
- 1 tbsp fresh ginger, minced
- 2 tbsp soy sauce
- 2 tbsp fish sauce
- 2 tbsp lime juice (freshly squeezed)
- 1 tbsp brown sugar
- 1-2 red chili peppers, finely sliced (optional for heat)
- 1/2 cup chicken broth or water
- Fresh cilantro leaves, chopped (for garnish)
- Lime wedges (for serving)
- French bread or baguette slices (optional, for serving)
How Much Time Will You Need?
This recipe will take about 15 minutes to prep, plus 3 to 4 hours of cooking time in the oven. So, make sure to plan ahead! While the pork is cooking, you’ll also have some time to prepare the rice and get everything ready for serving.
Step-by-Step Instructions:
1. Preheat the Oven:
Start by preheating your oven to 300°F (150°C). This low and slow cooking will make the pork super tender and delicious!
2. Sauté the Aromatics:
In a large oven-safe pot or Dutch oven, heat the vegetable oil over medium heat. Add the chopped onion and cook for about 5 minutes until it’s translucent. Then, toss in the minced garlic and ginger, cooking for another 1-2 minutes until they smell amazing!
3. Sear the Pork:
Next, add the pork shoulder to the pot. Sear it on all sides until nicely browned—about 3-4 minutes per side. This step adds a lot of flavor!
4. Mix the Sauce:
In a separate bowl, mix together the soy sauce, fish sauce, lime juice, brown sugar, and chicken broth or water. Pour this tasty mixture over the seared pork.
5. Add the Pineapple:
Now, sprinkle the pineapple chunks around the pork and on top. This will add a lovely sweetness to the dish as it cooks.
6. Cook the Pork:
Cover the pot with a lid and carefully transfer it to the oven. Let it cook for 3 to 4 hours, until the pork is so tender you can easily shred it with a fork.
7. Shred the Pork:
Once the pork is cooked, take it out of the oven and shred it using two forks. Mix the shredded pork with the juicy pineapple and sauce from the pot to keep everything flavorful and moist.
8. Cook the Rice:
While the pork is cooking, rinse the jasmine rice well in cold water. Then, cook it according to the package instructions. Fluffy rice is a great base for the pulled pork!
9. Serve and Enjoy:
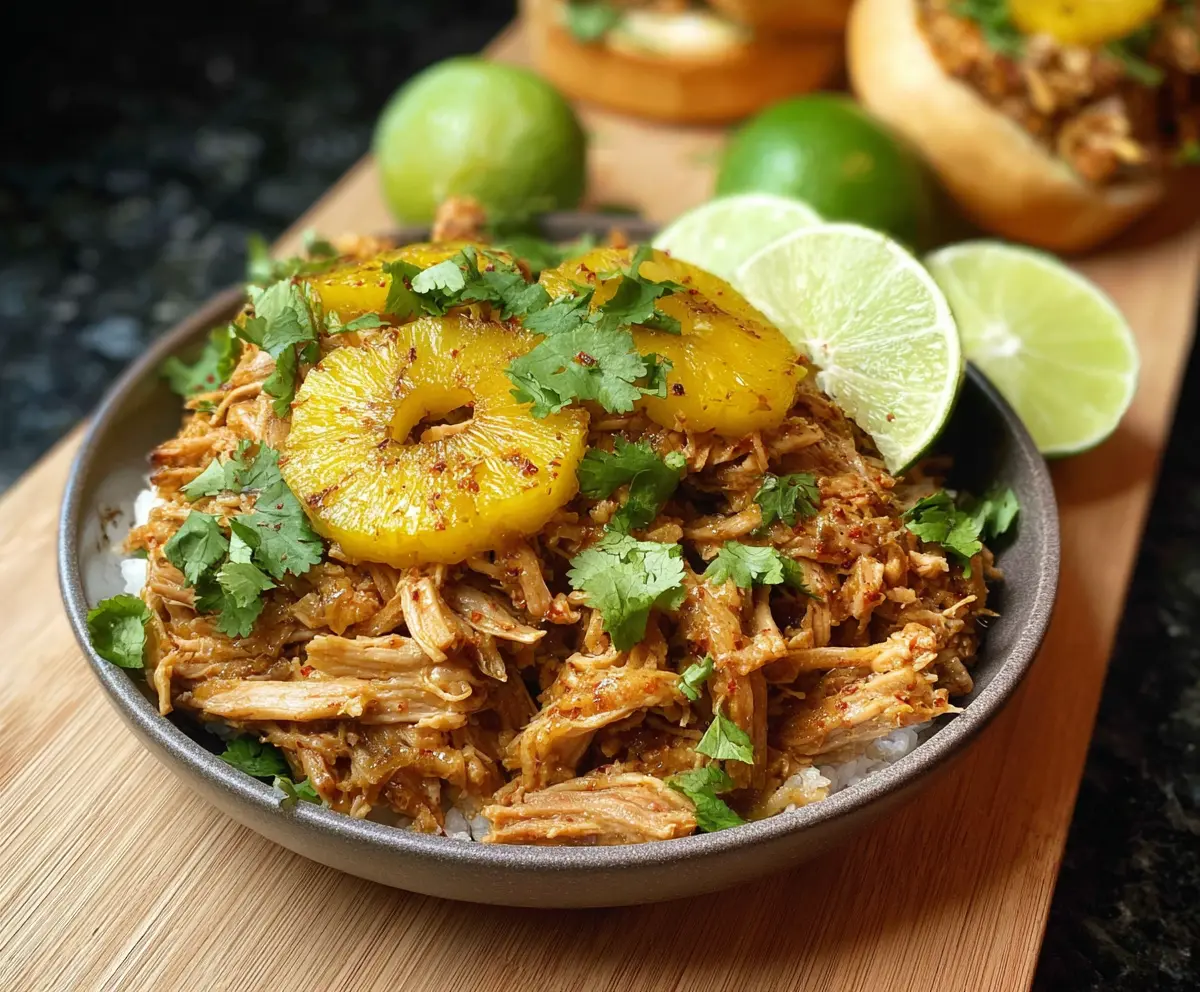
To serve, pile the pineapple Thai pulled pork over a generous scoop of cooked jasmine rice. Top it all off with fresh cilantro and don’t forget to offer lime wedges on the side for that extra zesty kick. If you like, serve with slices of French bread or baguette to soak up all the delicious sauce!
Enjoy your flavorful Pineapple Thai Pulled Pork with the sweet tang of pineapple and the fresh brightness of lime and cilantro!
Can I Use a Different Cut of Pork?
Absolutely! Pork butt (also known as pork shoulder) is commonly used for pulled pork, but you can also use pork loin. Just note that pork loin may cook faster and can become dry if overcooked, so keep an eye on the cooking time!
Can I Make This Recipe in a Slow Cooker?
Yes, you can! Sear the pork and sauté the aromatics as instructed, then transfer everything to a slow cooker. Cook on low for 8 hours or on high for 4-5 hours until the pork is tender and easily shreds.
How Do I Store Leftovers?
Store any leftovers in an airtight container in the fridge for up to 3 days. You can also freeze the pulled pork for up to 3 months. Just make sure to let it cool completely before transferring it to a freezer-safe container!
What Are Some Sides to Serve with This Dish?
Besides jasmine rice, this pulled pork pairs well with coleslaw for a crunch, sautéed vegetables, or a fresh cucumber salad to balance the richness. You can also enjoy it in sandwiches with the French bread or baguette!