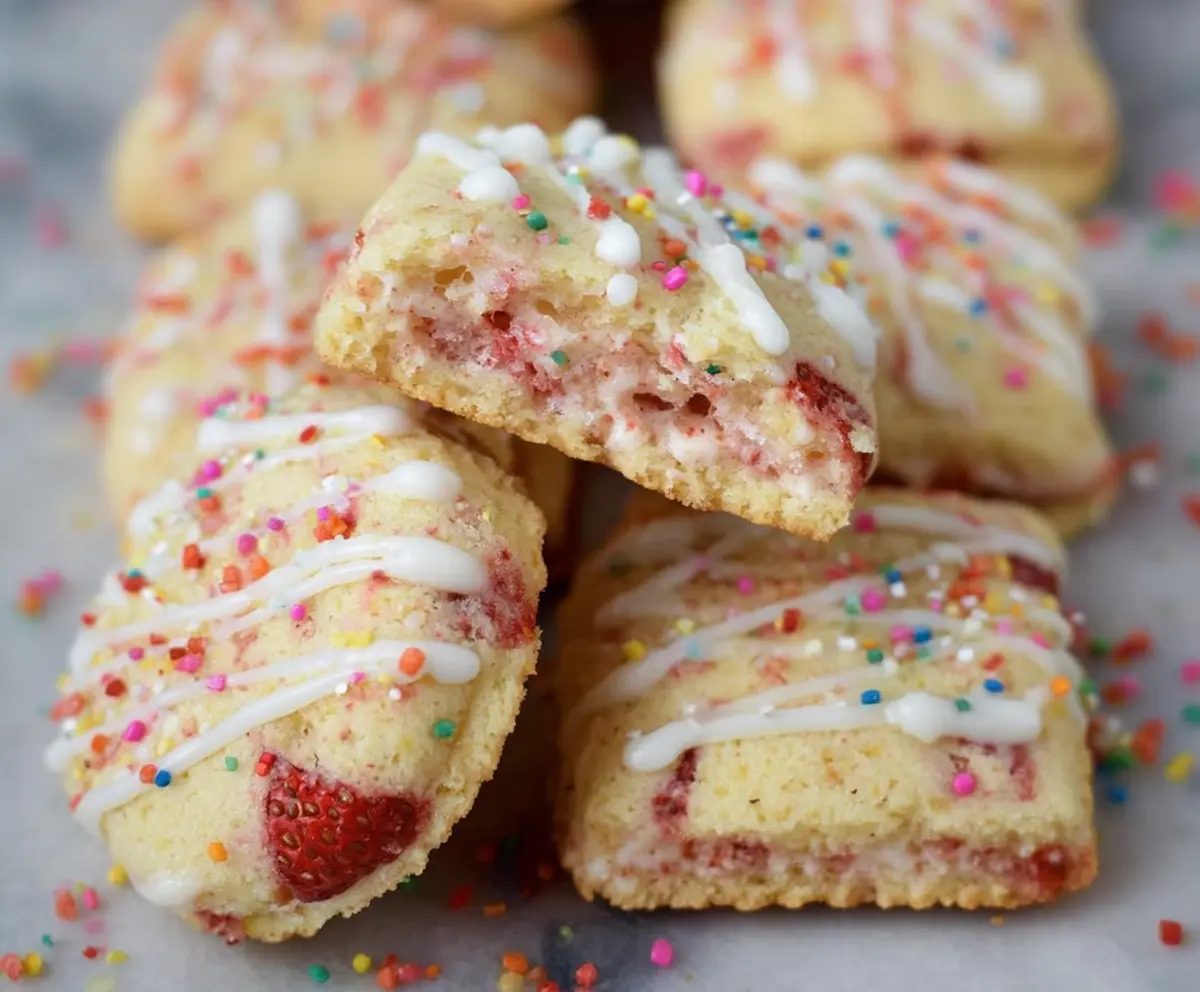
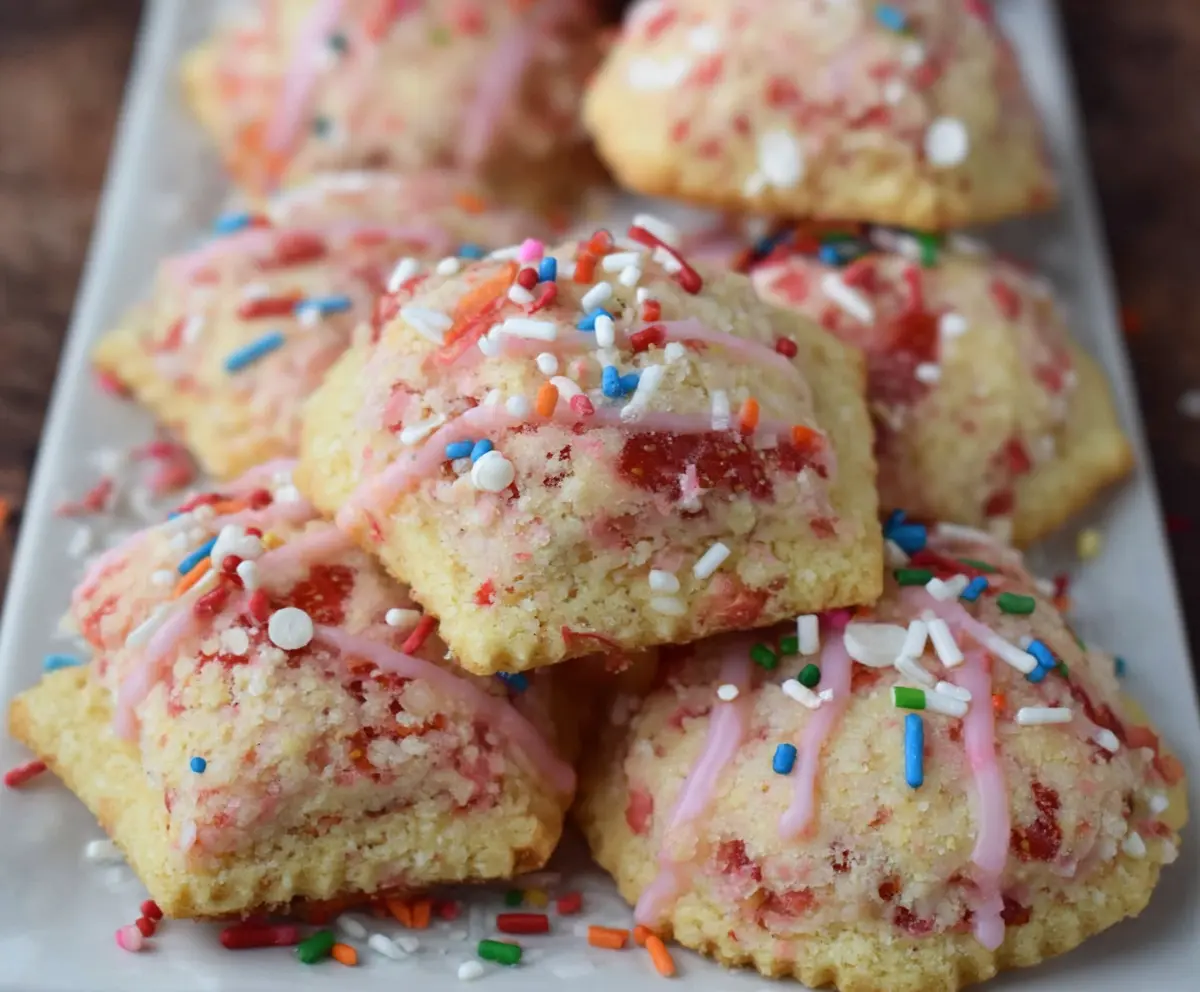
These Strawberry Pop Tart Cookies are a fun twist on the classic pastry! They are soft, sweet, and packed with strawberry goodness, making them a delightful treat for any day.
I love how easy they are to munch on, especially with that yummy frosting on top. Trust me; they don’t last long in my house—everyone just can’t resist that pink sweetness! 😋
Key Ingredients & Substitutions
Unsalted Butter: This gives your cookies a rich flavor and smooth texture. If you’re out of butter, you can use margarine or even coconut oil in a pinch, but it may slightly change the taste.
Granulated Sugar: It sweetens and helps with the cookie texture. Brown sugar is a great substitute if you want a chewier texture and a hint of caramel flavor.
Freeze-Dried Strawberries: These add a fruity punch without adding moisture. Can’t find them? Chopped fresh strawberries work, but be sure to reduce the jam amount to avoid sogginess.
Strawberry Jam: For filling, any fruit jam like raspberry or cherry can change things up while staying in the fruity realm. Homemade jam is a delicious alternative!
Rainbow Sprinkles: These are purely for decoration. Feel free to use themed sprinkles for holidays or special occasions – they always make goodies a bit more festive!
What’s the Best Way to Seal the Cookies Properly?
Sealing the cookies is vital so the jam doesn’t ooze out while baking. Here’s how you can ensure a good seal:
- After placing jam on half of the rectangles, carefully lay another rectangle on top.
- Press gently around the edges to seal them. Use a fork to crimp the edges—it’s a fun way to make them look pretty too!
- Before baking, double-check for any gaps where the jam can escape.
Taking this little extra care helps your cookies stay stuffed with delicious jam, creating a perfect balance of flavor!
How to Make Strawberry Pop Tart Cookies
Ingredients You’ll Need:
For the Cookie Dough:
- 1 cup unsalted butter, softened
- 1 cup granulated sugar
- 1 large egg
- 2 teaspoons pure vanilla extract
- 2 1/4 cups all-purpose flour
- 1/2 teaspoon baking powder
- 1/4 teaspoon salt
- 1/2 cup freeze-dried strawberries, crushed or chopped
For the Filling:
- 1/2 cup strawberry jam or preserves
For the Icing:
- 1 cup powdered sugar
- 2-3 tablespoons milk
- 1 teaspoon vanilla extract
For Decoration:
- Rainbow sprinkles
How Much Time Will You Need?
This tasty treat will take you about 20 minutes to prep and approximately 15 minutes to bake. Be sure to set aside some time for cooling because they need to fully cool before icing. Overall, expect to spend about 40 minutes to an hour before they’re ready to serve!
Step-by-Step Instructions:
1. Preheat the Oven:
Start by preheating your oven to 350°F (175°C). This will help your cookies bake evenly. While the oven is warming up, line your baking sheets with parchment paper so they’re ready for the cookies.
2. Make the Cookie Dough:
In a large mixing bowl, cream together the softened butter and granulated sugar. Use a hand mixer or a sturdy spoon to blend these until the mixture is light and fluffy. Next, add the egg and vanilla extract and mix until everything is well combined.
3. Combine the Dry Ingredients:
In another bowl, whisk together the flour, baking powder, salt, and crushed freeze-dried strawberries. This helps distribute all the dry ingredients evenly. Gradually add this dry mixture into the wet ingredients, stirring until you have a soft dough. Be careful not to overmix!
4. Shape the Cookies:
On a lightly floured surface, roll out the dough to about 1/4 inch thick. Use a sharp knife or a pizza cutter to cut the dough into rectangles, making them roughly 2 x 3 inches each. Lay half of these rectangles on your prepared baking sheets.
5. Fill the Cookies:
Take about a teaspoon of strawberry jam and place it in the center of each rectangle. Make sure to leave some space around the edges for sealing. Place the other half of the rectangles on top and gently press down around the edges. You can use a fork to crimp and secure the edges if you’d like.
6. Bake the Cookies:
Now it’s time to bake! Put the trays in the oven and bake for about 12-15 minutes, or until the edges turn lightly golden. Once done, remove them from the oven and let the cookies cool on the baking sheet for about 5 minutes, then transfer them to a wire rack to cool completely.
7. Prepare the Icing:
While the cookies are cooling, prepare the icing by whisking together powdered sugar, milk, and vanilla extract until smooth. Adjust the thickness by adding more milk or powdered sugar until it reaches your desired consistency.
8. Decorate the Cookies:
Once the cookies are completely cool, drizzle the icing over them. Don’t forget to sprinkle on those colorful decorations while the icing is still wet. This will help the sprinkles stick!
9. Serve and Enjoy!
Allow the icing to set before serving, and then enjoy your delicious Strawberry Pop Tart Cookies!
These cookies are sure to be a hit, bringing that classic pop tart flavor into a fun cookie form! 🥳
Can I Use Fresh Strawberries Instead of Freeze-Dried?
Yes, fresh strawberries can be used! Just remember to chop them finely and reduce the amount of strawberry jam to avoid sogginess in the cookies.
How Should I Store Leftover Cookies?
Store any leftovers in an airtight container at room temperature for up to 3 days. If you want to keep them longer, you can refrigerate them, but be sure to let them sit out for a bit to return to room temperature before enjoying!
Can I Make These Cookies Gluten-Free?
Absolutely! Substitute the all-purpose flour with a gluten-free flour blend that measures 1:1. This should work well for cookies and maintain a similar texture.
What Can I Substitute for the Icing Ingredients?
If you’re out of powdered sugar, you can make your own by blending granulated sugar until it’s fine. For a dairy-free option, use a non-dairy milk like almond milk in the icing.