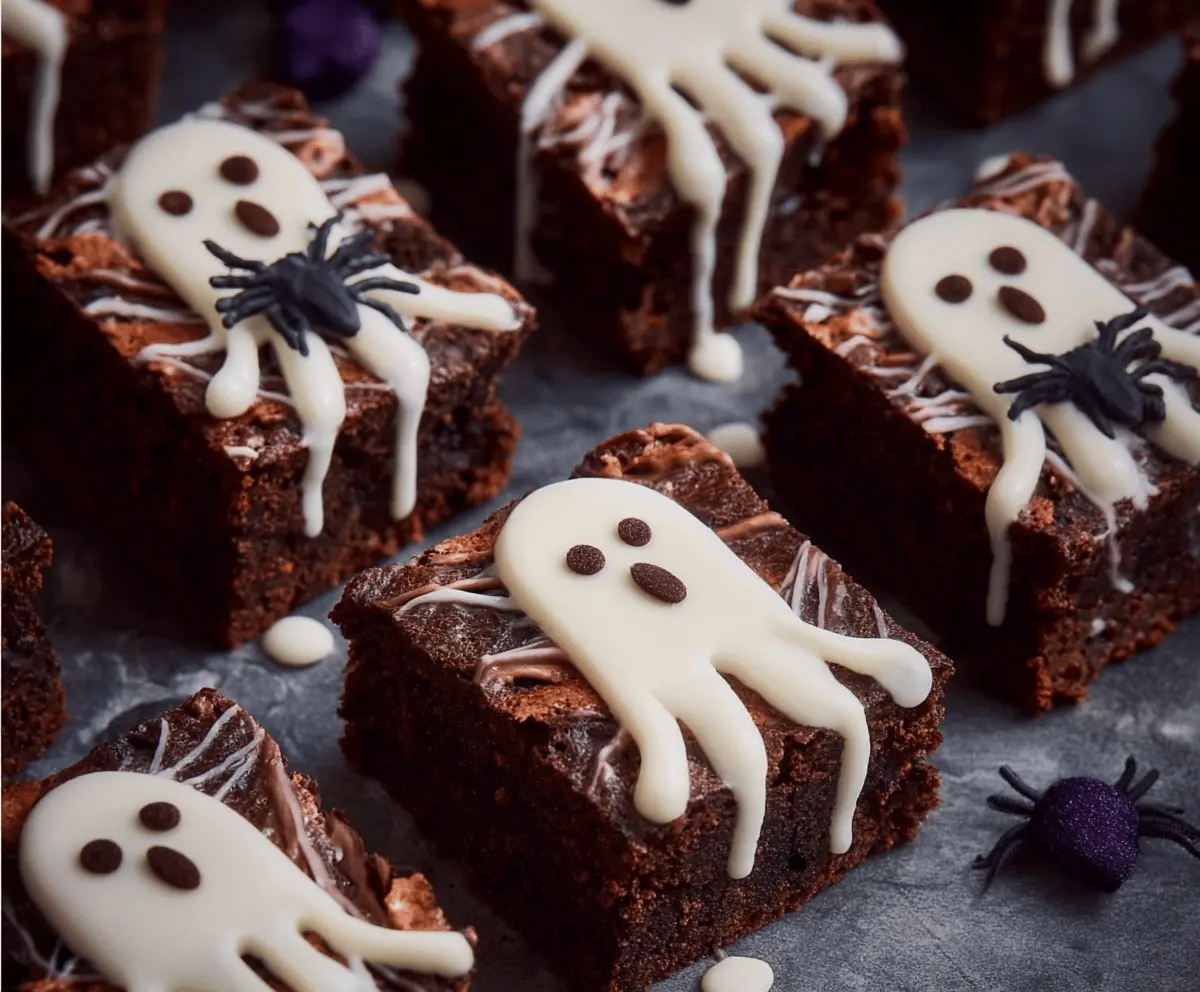
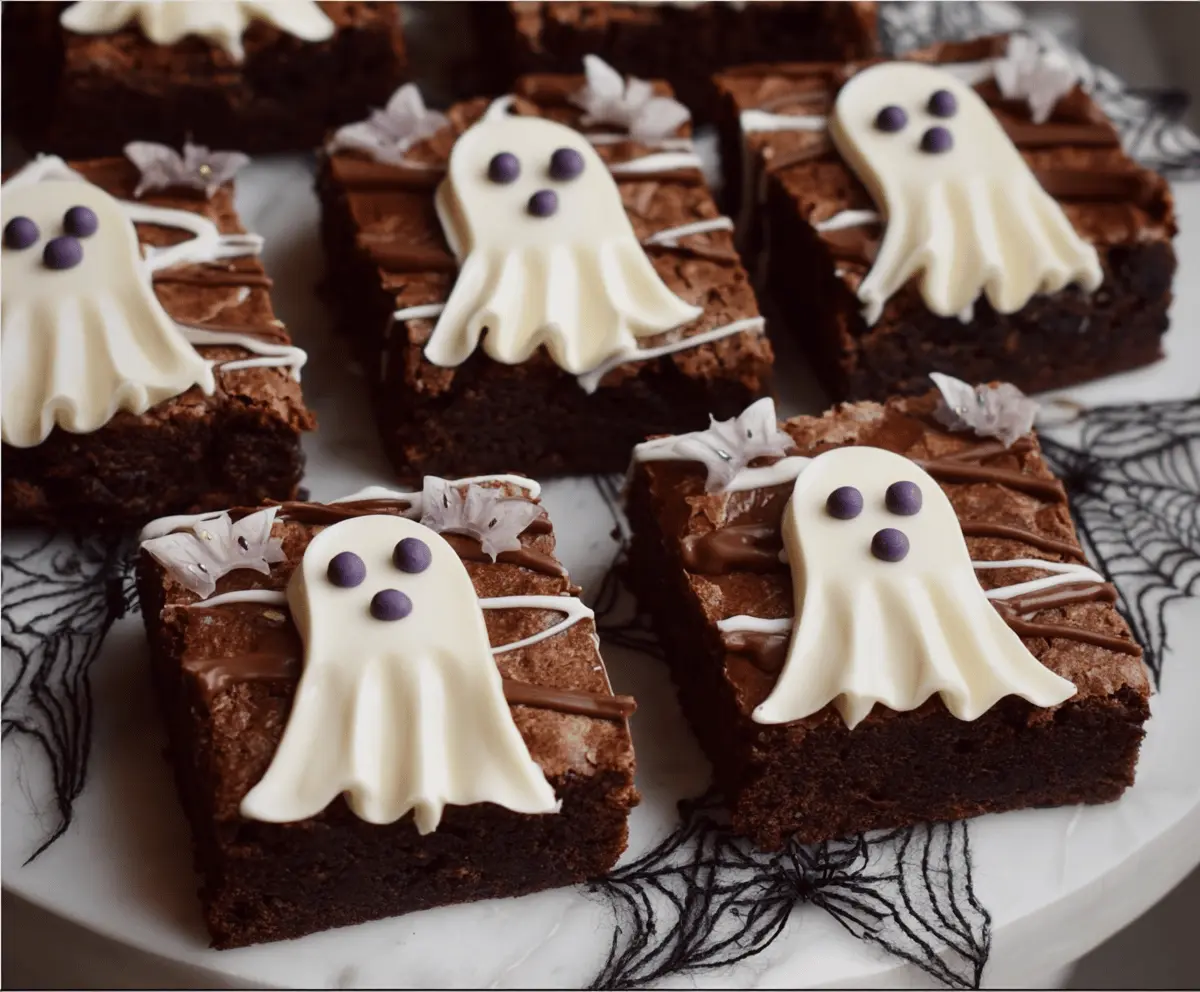
These Halloween ghost brownie treats are a spooky twist on a classic dessert! Made with rich, fudgy brownies and topped with cute ghost shapes, they are sure to delight kids and adults alike.
I love how easy it is to create these little ghostly figures with frosting. Perfect for a Halloween party or just to enjoy while watching scary movies! Who wouldn’t want a little treat with a boo? 👻
Key Ingredients & Substitutions
Butter: Unsalted butter is best for these brownies to control the salt level. If you’re in a pinch, you can use margarine, but I personally prefer the flavor of good butter for a rich, fudge-like texture.
Sugar: Granulated sugar adds sweetness, but you can swap half with brown sugar. This gives the brownies a deeper flavor and more moisture.
Cocoa powder: Unsweetened cocoa is key for that deep chocolate taste. If you want to cut caffeine, use carob powder. It has a milder flavor but works well!
Candy melts: These are perfect for decorating. If you can’t find purple, just use dark chocolate chips or colorful frosting. You can get creative with edible decorations!
How Can I Make Perfect Ghost Shapes?
Making those cute ghost shapes is simpler than you might think! Here’s how to do it right:
- Melt the white candy melts gently in the microwave, stirring every 30 seconds until smooth.
- If you don’t have a ghost mold, spoon small dollops onto parchment paper, using the back of a spoon to shape them into ghost shapes. Get crafty with the edges!
- Let the melted candy set at room temperature or pop them in the fridge for quicker hardening.
Keeping the melted mix just warm enough while decorating helps stick your candy eyes on easily! Enjoy crafting these little ghosts!
Halloween Ghost Brownie Treats
Ingredients You’ll Need:
For the Brownies:
- 1 cup (2 sticks) unsalted butter
- 2 cups granulated sugar
- 4 large eggs
- 1 teaspoon vanilla extract
- 1 cup all-purpose flour
- 3/4 cup unsweetened cocoa powder
- 1/2 teaspoon baking powder
- 1/4 teaspoon salt
For the Ghost Decoration:
- 1 cup white candy melts or white chocolate
- PURPLE candy melts or small purple edible candy pearls (for eyes and mouth)
- White and milk chocolate (for drizzling, optional)
- Edible silver star decorations (optional)
How Much Time Will You Need?
This recipe takes about 15 minutes for preparation, plus 25 to 30 minutes for baking, and additional time for cooling and decorating. Allow about 1 hour in total to let everything come together perfectly.
Step-by-Step Instructions:
1. Prepare the Brownies:
Start by preheating your oven to 350°F (175°C). Grease and line a 9×13-inch baking pan with parchment paper so that the brownies come out easily. In a saucepan, melt the butter over low heat. Once melted, remove it from heat and stir in the granulated sugar until well combined. Beat in the eggs, one at a time, and then add the vanilla extract. In another bowl, combine the flour, cocoa powder, baking powder, and salt by sifting them together. Gradually add the dry ingredients to the butter mixture, and stir until just combined. Finally, pour the batter into your prepared pan and spread it evenly. Bake for 25 to 30 minutes. Check for doneness by inserting a toothpick; it should come out with moist crumbs. Allow your brownies to cool completely in the pan.
2. Cut the Brownies:
After the brownies have cooled, cut them into squares with a sharp knife. This will allow you to easily decorate each square with your ghostly treats!
3. Make the Ghost Candy Decorations:
Next, melt your white candy melts according to the package instructions. A great method is to microwave them in 30-second bursts, stirring in between. Once melted, line a flat surface or a piece of parchment paper. If you have a ghost-shaped mold, pour the candy in there. If not, you can spoon out ghost shapes onto the parchment paper, using the back of a spoon to create the flowing skirt effect. Let your ghost shapes set at room temperature or place them in the fridge until they are hardened.
4. Add Ghost Faces:
Once your ghost decorations are set, it’s time to give them some character! Using purple candy melts or edible candy pearls, use two dots for the eyes and one dot for the mouth while the white candy is still slightly tacky. If you’d like, you can use a small paintbrush or toothpick to add the melted purple candy dots, giving them a perfect ghostly face.
5. Decorate the Brownies:
Place one ghost candy decoration on each brownie square. If you’d like to add a spooky touch, drizzle some melted white and milk chocolate over the brownies to create a delightful spider web effect. You can also sprinkle some edible silver star decorations around the ghosts to add some extra sparkle!
6. Serve & Enjoy:
Arrange the ghostly brownie treats on a serving platter and get ready for your guests to be amazed! Store any leftovers in an airtight container at room temperature or in the refrigerator, especially if it’s warm outside.
These spooky and delicious Halloween ghost brownie treats are perfect for celebrations and will definitely impress your friends and family with their adorable designs and rich chocolate flavor. Enjoy making these festive goodies!
Can I Use Dark Chocolate Instead of Cocoa Powder?
While you can use dark chocolate, it’s best to stick with unsweetened cocoa powder to maintain the texture and flavor balance in the brownies. If you decide to use dark chocolate, reduce the sugar slightly as dark chocolate is sweeter than cocoa powder.
Can I Make These Brownies Gluten-Free?
Absolutely! Simply substitute the all-purpose flour with a gluten-free flour blend. Make sure to choose a blend that includes xanthan gum for the best texture.
How Can I Store Leftover Brownies?
Store any leftover brownies in an airtight container at room temperature for up to 3 days. If you want to keep them fresh longer, you can refrigerate them for up to a week or freeze them for up to 3 months.
Can I Use Different Colors for the Ghost Faces?
Yes, definitely! Get creative with your ghost decorations. Use colored candy melts or frosting—experiment with colors that fit your Halloween theme or use different colors for a fun twist!