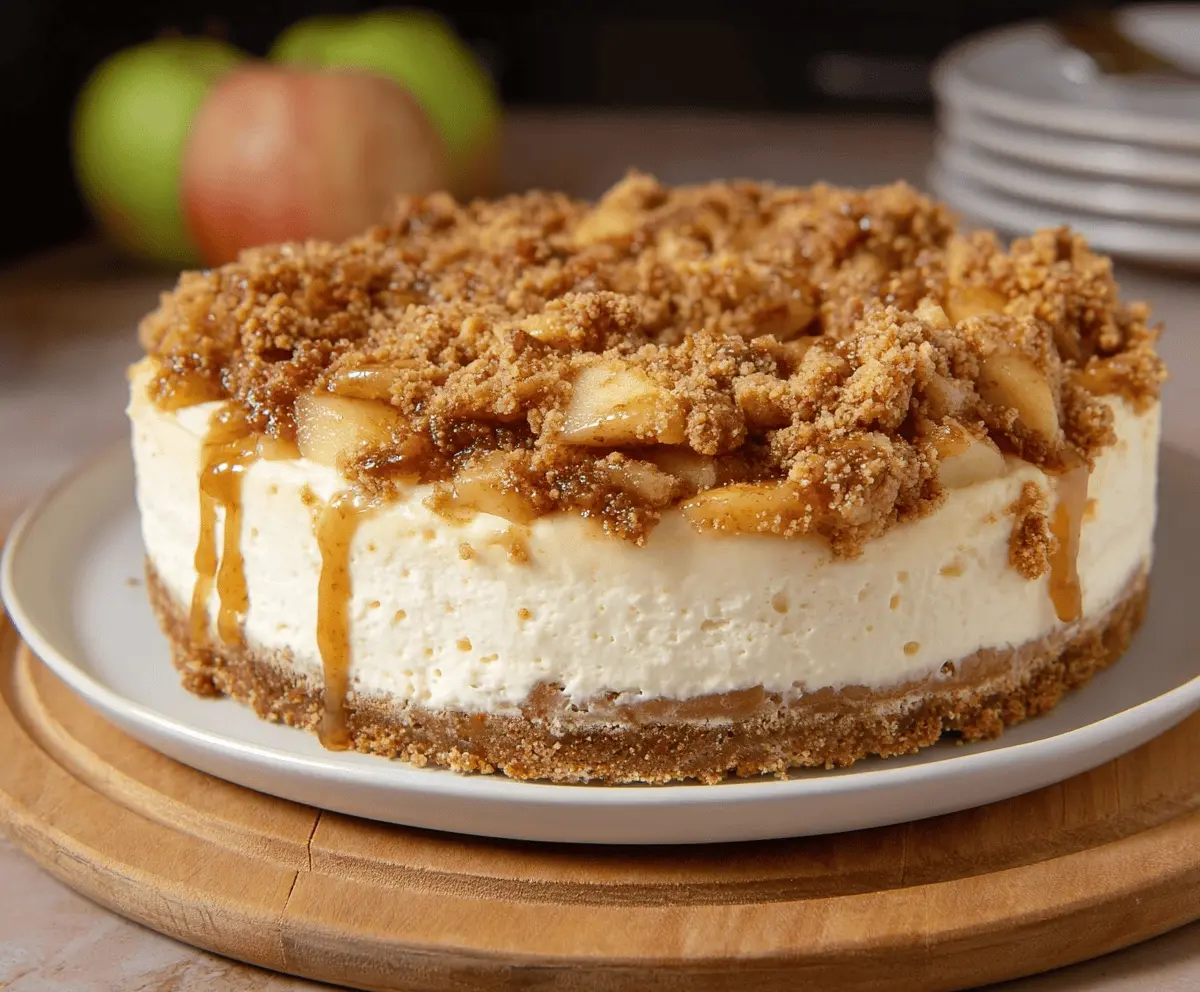
This No-Bake Apple Crumble Cheesecake is a sweet treat that combines creamy cheesecake and crunchy apple crumble. It’s easy to whip up without turning on the oven!
You might just find yourself fighting off others for the last slice—it’s that good! I love serving it chilled after dinner for a cool, refreshing dessert. Yum!
Key Ingredients & Substitutions
Graham Cracker Crumbs: These make a great base for the crust because they’re sweet and easy to work with. If you don’t have them, try using crushed digestive biscuits or even crushed pretzels for a unique twist.
Apples: I love using Granny Smith apples for their tartness, which balances the sweetness of the cheesecake. Fuji and Honeycrisp also work well. If you’re looking for a lower sugar option, feel free to use any tart apples or even pears!
Walnuts/Pecans: These nuts add a lovely crunch to the crumble topping. If you have nut allergies or prefer a different flavor, try using seeds like sunflower or pumpkin seeds instead.
Heavy Cream: This contributes to the cheesecake’s fluffy texture. If you want a lighter option, you could use whipped coconut cream. Just make sure it’s well-chilled before whipping!
How Do I Make Sure My Cheesecake Fills Fluffy and Creamy?
The secret lies in how you combine the ingredients, especially the cream cheese and whipped cream. Here’s how to nail it:
- First, make sure your cream cheese is really softened. It should feel like butter when you touch it. This helps it blend smoothly.
- When whipping the cream, ensure your bowl and beaters are cold. The cold helps it whip to stiff peaks better.
- Be gentle when folding the whipped cream into the cream cheese mixture. Use a spatula and fold in from the bottom to the top, taking care not to deflate the air bubbles you created.
- For a perfectly set cheesecake, give it plenty of time to chill—aim for overnight if you can!

No-Bake Apple Crumble Cheesecake
Ingredients You’ll Need:
For the Crust:
- 1 1/2 cups (150g) graham cracker crumbs or digestive biscuits, finely crushed
- 1/4 cup (50g) granulated sugar
- 1/2 cup (115g) unsalted butter, melted
For the Apple Crumble Topping:
- 2 medium apples (such as Granny Smith or Fuji), peeled, cored, and diced
- 2 tbsp unsalted butter
- 1/4 cup (50g) brown sugar
- 1/2 tsp ground cinnamon
- 1/4 tsp ground nutmeg
- 1/2 cup (60g) all-purpose flour
- 1/4 cup (25g) rolled oats
- 1/4 cup (40g) chopped walnuts or pecans (optional)
For the Cheesecake Filling:
- 16 oz (450g) cream cheese, softened
- 1 cup (240ml) heavy whipping cream
- 2/3 cup (85g) powdered sugar, sifted
- 1 tsp vanilla extract
- 1 tbsp lemon juice (optional, to brighten flavor)
How Much Time Will You Need?
This delightful cheesecake will take about 30 minutes to prepare, plus at least 4 hours (or overnight) to chill in the fridge. It’s an easy dessert that you can make ahead of time and serve whenever you’re ready!
Step-by-Step Instructions:
1. Prepare the Crust:
In a medium bowl, mix together the graham cracker crumbs, sugar, and melted butter. Stir until the crumbs are evenly coated, resembling wet sand. Press this mixture firmly into the bottom of a 9-inch (23cm) springform pan or pie dish to make a solid crust. Pop it in the fridge to chill while you get everything else ready.
2. Make the Apple Crumble Topping:
In a skillet over medium heat, melt the butter. Add the diced apples along with the brown sugar, cinnamon, and nutmeg. Cook while stirring occasionally until the apples soften and start to caramelize, which should take about 5-7 minutes. Once done, remove the skillet from heat. In a separate bowl, mix the flour, oats, and nuts if you’re using them, then stir this mix into the cooked apples until it becomes crumbly. Let it cool down to room temperature.
3. Prepare the Cheesecake Filling:
In a large bowl, use an electric mixer to beat the softened cream cheese until it’s nice and smooth. Gradually add the powdered sugar and vanilla extract, mixing until everything is well blended. In another chilled bowl, whip the heavy cream until it forms stiff peaks. Gently fold the whipped cream into the cream cheese mixture until it’s totally smooth. If you’d like, stir in the lemon juice for a little extra flavor.
4. Assemble the Cheesecake:
Spread about two-thirds of the cheesecake filling evenly over the chilled crust. Then, take half of the cooled apple crumble topping and gently fold it into the filling to create some delicious swirls. Next, spread the remaining cheesecake filling on top and smooth it out. Finally, sprinkle the rest of the apple crumble topping evenly over the cheesecake.
5. Chill:
Cover the cheesecake with plastic wrap and place it in the fridge to chill for a minimum of 4 hours, but preferably overnight, so it sets beautifully.
6. Serve:
When you’re ready to serve, carefully remove the cheesecake from the springform pan. Slice it up and enjoy it cold. You can also sprinkle some extra chopped nuts or a dash of cinnamon on top for extra flair!
Enjoy your creamy, fruity No-Bake Apple Crumble Cheesecake!
FAQ for No-Bake Apple Crumble Cheesecake
Can I Use a Different Type of Cookie for the Crust?
Absolutely! If graham crackers aren’t your thing, you can use digestive biscuits, vanilla wafers, or even crushed Oreos for a chocolate twist. Just make sure they are finely crushed and combined well with the melted butter.
How Do I Store Leftovers?
Keep any leftovers in an airtight container in the fridge for up to 3 days. To maintain freshness, avoid putting any toppings on before storing. Simply add any extra toppings before serving.
Can I Make This Cheesecake Vegan?
You can certainly adapt this recipe! Use vegan cream cheese and whip coconut cream in place of heavy cream. For the crust, ensure the cookies are vegan-friendly, and you can use non-dairy butter for the crumble.
What If I Don’t Have a Springform Pan?
No problem! You can make this cheesecake in a regular pie dish or a square baking pan. Just be sure to line the bottom with parchment paper for easy removal if using a pan without a removable bottom. Enjoy!